[Android] LinearLayout 정리
📚LinearLayout
📔View와 ViewGroup
안드로이드에서 View는 화면에 표시되는 위젯 또는 인터페이스 요소를 나타내며, 안드로이드의 모든 UI 구성 요소에 대한 기본 클래스이다. 화면에 보이는 구성요소들 button, text field, image 등은 모두 View이다.
ViewGroup은 다른 View들을 유지하는 데 사용되는 View의 하위 클래스이다. View의 계층 구조를 만들고 사용자 인터페이스의 레이아웃을 정의하는 데 사용된다. ViewGroup의 하위 클래스로 LinearLayout, RelativeLayout, ConstraintLayout 등이 있고 오늘은 이 중 LinearLayout에 대해 살펴보고자 한다.
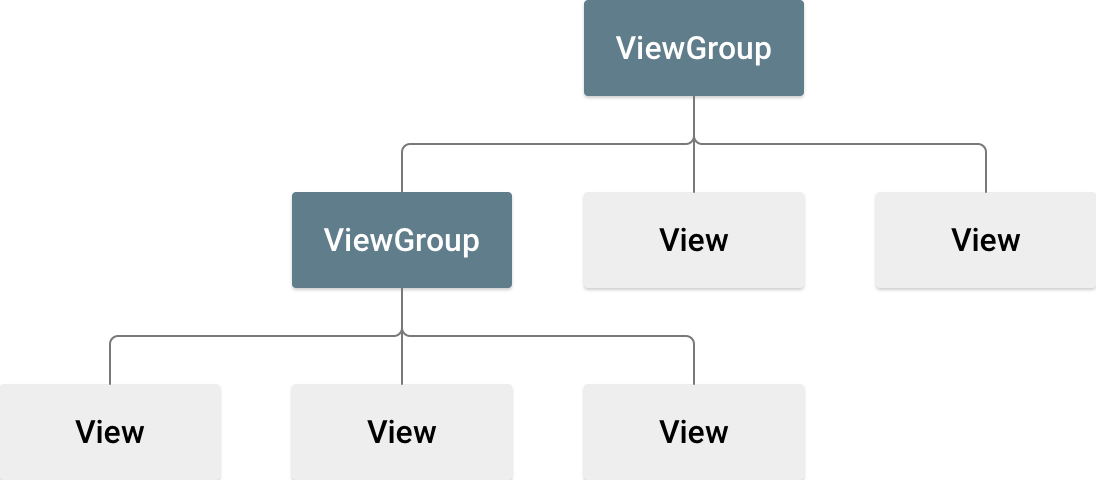
ViewGroup은 포함된 View의 위치 지정 및 크기 조정을 담당하고 세부적인 레이아웃 구성을 위해 중첩될 수 있다. 일반적으로 View를 사용하여 앱의 개별 인터페이스 요소를 나타내고 ViewGroup 개체를 사용하여 해당 View를 유지하고 정렬한다.
📔LinearLayout
LinearLayout은 View들을 수평이나 수직으로 배치할 수 있는 레이아웃(뷰 그룹)이다. LinearLayout의 주요 속성들을 살펴보면 다음과 같다.
📖LinearLayout의 속성
| 속성명 | 설명 |
|---|---|
android:baselineAligned |
기준점을 설정해서 정렬하는 기능으로 false로 설정하면 baselines 정렬을 하지 않는다. 기본값은 true이다 |
android:baselineAlignedChildIndex |
linearlayout이 다른 레이아웃의 일부인 경우 baseline으로 정렬할 자식 뷰를 지정 |
android:divider |
drawable을 button 사이의 수직 구분자로 사용 |
android:gravity |
뷰가 영역 내에서, 배치될 위치를 지정 |
android:measureWithLargestChild |
true로 설정하면 weight 값을 가지는 모든 하위 요소가 가장 큰 하위 요소의 최소 크기를 가짐 |
android:orientation |
수직 또는 수평의 정렬 방향을 지정 |
android:weightSum |
하위 요소들이 갖는 weight의 합 |
📖LinearLayout 선언 예
<?xml version="1.0" encoding="utf-8"?>
<LinearLayout xmlns:android="http://schemas.android.com/apk/res/android"
    xmlns:app="http://schemas.android.com/apk/res-auto"
    xmlns:tools="http://schemas.android.com/tools"
    android:layout_width="match_parent"
    android:layout_height="match_parent"
    tools:context=".MainActivity">

</LinearLayout>
📖android:baselineAligned
baseline을 기준으로 정렬을 할지 설정하는 속성이다. 즉, 값이 true이면 하단 정렬을, false이면 상단 정렬을 하겠다는 의미이며 글자가 들어있는 가장 크기가 큰 뷰를 기준으로 정렬한다.
이해를 돕기 위해 사진으로 보자면, 먼저 각각의 크기가 다른 텍스트 뷰 4개를 준비했다.
<?xml version="1.0" encoding="utf-8"?>
<LinearLayout xmlns:android="http://schemas.android.com/apk/res/android"
    xmlns:app="http://schemas.android.com/apk/res-auto"
    xmlns:tools="http://schemas.android.com/tools"
    android:layout_width="match_parent"
    android:layout_height="match_parent"
    android:baselineAligned="true"
    android:orientation="horizontal"
    tools:context=".MainActivity">

    <TextView
        android:layout_width="wrap_content"
        android:layout_height="wrap_content"
        android:text="텍스트1"
        android:textSize="10sp" />

    <TextView
        android:layout_width="wrap_content"
        android:layout_height="wrap_content"
        android:text="텍스트2"
        android:textSize="15sp" />

    <TextView
        android:layout_width="wrap_content"
        android:layout_height="wrap_content"
        android:text="텍스트3"
        android:textSize="20sp" />

    <TextView
        android:layout_width="wrap_content"
        android:layout_height="wrap_content"
        android:text="텍스트4"
        android:textSize="25sp" />


</LinearLayout>
위에서 android:baselineAligned="true"로 설정되어 있다면, 결과는 다음과 같이 텍스트들이 하단 정렬되어 있다.
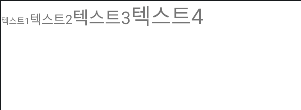
반대로 이 값이 false로 설정되어 있다면, 텍스트들이 상단 정렬된 결과를 보여준다.

당연히 이 속성은 android:orientation="horizontal"로 설정되어 있을 시에만 가능하다. 수직으로 정렬되어 있어서는 기준선을 잡을 수 없기 때문이다.
📖android:baselineAlignedChildIndex
이 속성은 위 android:baselineAligned 속성과 기능이 같다. 다만, 속성명의 Index가 의미하듯이, 특정 하위 요소의 인덱스를 지정하여 기준선으로 잡는다. 위 텍스트 4개를 예로 들자면, 각각 0, 1, 2, 3의 인덱스 번호를 가진다.
📖android:divider
해당 속성은 말 그대로 구분선을 의미한다. drawable 경로에 있는 파일을 사용하여 뷰 사이에 구분선이 삽입된다.
📖android:gravity
gravity 속성은 해당 뷰의 위치를 지정할 때 사용한다.
속성값들을 정리해보면 다음과 같다.
📖gravity의 속성값
| 속성명 | 설명 |
|---|---|
| left | 뷰의 왼쪽에 배치 |
| right | 뷰의 오른쪽에 배치 |
| start | 뷰를 부모 뷰그룹의 시작점에 배치 |
| end | 뷰를 부모 뷰그룹의 마지막에 배치 |
| top | 뷰를 상단에 배치 |
| bottom | 뷰를 하단에 배치 |
| center | 뷰를 중앙에 배치 |
| center_horizontal | 뷰를 가로 중앙에 배치 |
| center_vertical | 뷰를 세로 중앙에 배치 |
| clip_horizontal | 뷰의 가로 길이가 부모 뷰그룹보다 클 경우 초과된 부분을 잘라냄 |
| clip_vertical | 뷰의 세로 길이가 부모 뷰그룹보다 클 경우 초과된 부분을 잘라냄 |
| fill | 뷰를 부모 뷰그룹의 크기에 맞게 채움 |
| fill_horizontal | 뷰의 가로를 부모 뷰그룹의 사이즈에 맞게 채움 |
| fill_vertical | 뷰의 세로를 부모 뷰그룹의 사이즈에 맞게 채움 |
🔖gravity와 layout_gravity의 차이
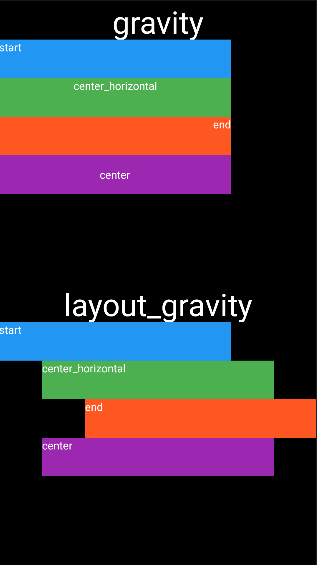
gravity 속성은 해당 View 내부의 자식 뷰의 위치를 설정한다. 반면, layout_gravity는 View를 감싸고 있는 상위 View를 기준으로 했을 때 View의 위치를 설정하게 된다. 그림으로 설명하면 이해하기 쉽다.
📖android:measureWithLargestChild
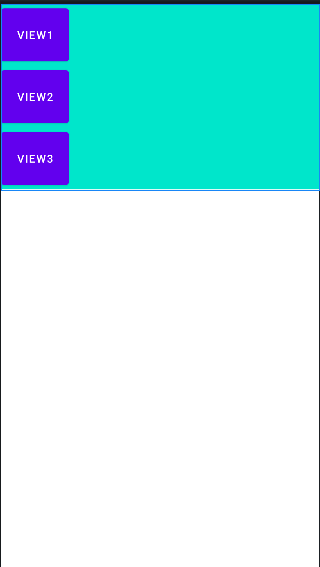
이 속성은 언제 쓰일지는 모르겠다. 가장 큰 크기를 가진 자식 뷰의 크기만큼 layout_weight 속성을 가진 자식 뷰들이 같은 크기를 가진다.
<?xml version="1.0" encoding="utf-8"?>
<LinearLayout xmlns:android="http://schemas.android.com/apk/res/android"
    android:orientation="vertical"
    android:layout_width="match_parent"
    android:layout_height="wrap_content"
    android:background="#00e6cb"
    android:measureWithLargestChild="true"
    >

    <Button
        android:layout_width="wrap_content"
        android:layout_height="30dp"
        android:text="View1"
        android:layout_weight="1"
        android:id="@+id/button" />

    <Button
        android:layout_width="wrap_content"
        android:layout_height="50dp"
        android:text="View2"
        android:layout_weight="2"
        android:id="@+id/button2" />

    <Button
        android:layout_width="wrap_content"
        android:layout_height="80dp"
        android:text="View3"
        android:layout_weight="3"
        android:id="@+id/button3" />
</LinearLayout>
📖android:orientation
LinearLayout의 android:orientation 속성을 사용하여 레이아웃 방향을 지정할 수 있다.
확인을 위해 레이아웃을 구성하는 뷰로 TextView를 세 개 만들었다. 먼저 android:orientation 속성의 값을 vertical로 지정하였을 경우,
<?xml version="1.0" encoding="utf-8"?>
<LinearLayout xmlns:android="http://schemas.android.com/apk/res/android"
    xmlns:app="http://schemas.android.com/apk/res-auto"
    xmlns:tools="http://schemas.android.com/tools"
    android:orientation="horizontal"
    android:layout_width="match_parent"
    android:layout_height="match_parent"
    tools:context=".MainActivity">

    <TextView
        android:layout_width="wrap_content"
        android:layout_height="wrap_content"
        android:text="텍스트1"
        android:textSize="24sp" />

    <TextView
        android:layout_width="wrap_content"
        android:layout_height="wrap_content"
        android:text="텍스트2"
        android:textSize="24sp" />

    <TextView
        android:layout_width="wrap_content"
        android:layout_height="wrap_content"
        android:text="텍스트3"
        android:textSize="24sp" />

</LinearLayout>
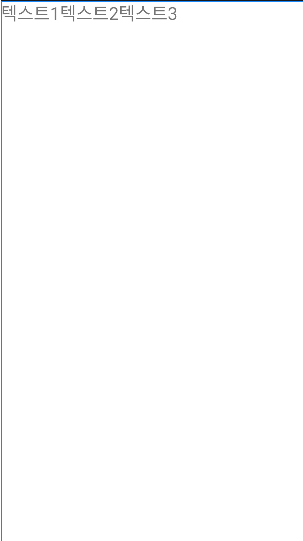
텍스트 3개가 나란히 수평으로 정렬되어 있는 것을 볼 수 있다.
다음은 값을 vertical로 설정하였을 경우이다.
<?xml version="1.0" encoding="utf-8"?>
<LinearLayout xmlns:android="http://schemas.android.com/apk/res/android"
    xmlns:app="http://schemas.android.com/apk/res-auto"
    xmlns:tools="http://schemas.android.com/tools"
    android:orientation="vertical"
    android:layout_width="match_parent"
    android:layout_height="match_parent"
    tools:context=".MainActivity">

    <TextView
        android:layout_width="wrap_content"
        android:layout_height="wrap_content"
        android:text="텍스트1"
        android:textSize="24sp" />

    <TextView
        android:layout_width="wrap_content"
        android:layout_height="wrap_content"
        android:text="텍스트2"
        android:textSize="24sp" />

    <TextView
        android:layout_width="wrap_content"
        android:layout_height="wrap_content"
        android:text="텍스트3"
        android:textSize="24sp" />

</LinearLayout>
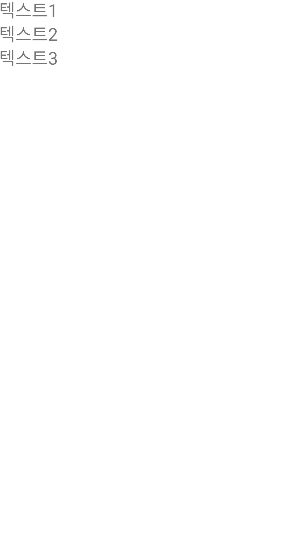
3개의 텍스트가 수직으로 정렬되어 있다.
📖android:weightSum
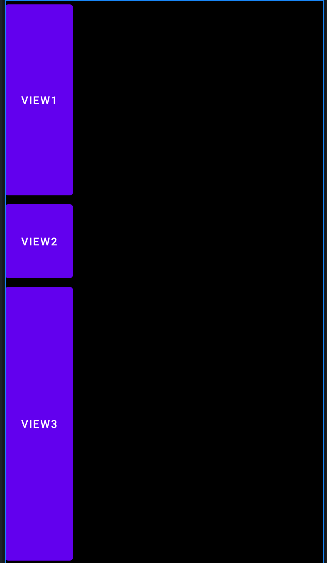
ViewGroup에 android:weightSum 속성값을 지정하고, 자식 뷰에 android:layout_weight 값을 지정하면 해당하는 값에 따라 비율에 맞춰 크기를 가진다.
<?xml version="1.0" encoding="utf-8"?>
<LinearLayout xmlns:android="http://schemas.android.com/apk/res/android"
    android:layout_width="match_parent"
    android:layout_height="match_parent"
    android:background="@color/black"
    android:orientation="vertical"
    android:weightSum="50">

    <Button
        android:id="@+id/button"
        android:layout_width="wrap_content"
        android:layout_height="30dp"
        android:layout_weight="20"
        android:text="View1" />

    <Button
        android:id="@+id/button2"
        android:layout_width="wrap_content"
        android:layout_height="50dp"
        android:layout_weight="5"
        android:text="View2" />

    <Button
        android:id="@+id/button3"
        android:layout_width="wrap_content"
        android:layout_height="80dp"
        android:layout_weight="25"
        android:text="View3" />
</LinearLayout>
