[Android] Part2-뉴스 앱
아래 내용은 패스트 캠퍼스 [35개 프로젝트로 배우는 Android 앱 개발 feat. Jetpack Compose]의 강의 내용을 기반으로 작성한 자습 기록입니다.
뉴스 앱
ℹ️앱 설명
뉴스 앱으로 분야별로 뉴스를 보거나 검색어를 입력해 해당 뉴스를 볼 수 있는 앱
✅구현 기능
- Retrofit 라이브러리를 사용하여 구글 뉴스의 RSS 접근
- Jsoup 라이브러리를 사용하여 html 이미지 가져오기
- Glide 라이브러리를 사용하여 이미지 연동
- Lottie 라이브러리를 사용하여 애니메이션 구현
- TikXml 라이브러리를 사용하여 xml 데이터 파싱
✅사용되는 기능
- Android
- Retrofit
- Material Design
- CardView
- Chip
- Jsoup
- Glide
- Lottie
📔 Retrofit을 이용해 서버 데이터 불러오기
시작하기 앞서 뉴스 앱에서는 인터넷을 사용하니 매니페스트 파일에 인터넷 퍼미션을 허용하도록 한다. 또한 서버에서 값을 불러오기 위해 Retrofit 라이브러리와 xml 파싱을 위해 TikXml 라이브러리 또한 등록시켜 준다.
androidManifest.xml
<uses-permission android:name="android.permission.INTERNET" />
app:Build.gradle
plugins {

    ...

    id 'kotlin-kapt'
}

    ...

dependencies {

    ...

    // retrofit
    implementation 'com.squareup.retrofit2:retrofit:2.9.0'

    // tikxml
    implementation 'com.tickaroo.tikxml:annotation:0.8.13'
    implementation 'com.tickaroo.tikxml:core:0.8.13'
    kapt 'com.tickaroo.tikxml:processor:0.8.13'
    implementation 'com.tickaroo.tikxml:retrofit-converter:0.8.13'

}
다음으로 Retrofit을 등록시켜주기 위해 Object 파일을 하나 만들어 설정을 해준다. 기본 URL은 구글의 뉴스를 사용하므로 구글 뉴스의 URL을 사용한다. 이전 프로젝트와 Retrofit 설정에서 차이점이 존재하는데 addConverterFactory()에 사용되는 인자 값으로 GsonConverterFactory가 아닌 TikXmlConverterFactory가 사용되었다. 이번에는 Json 데이터가 아니라 Xml 데이터를 가져오기 때문에 해당하는 ConverterFactory로 등록시켜 주고, 빌더를 통해 한 가지 설정을 추가해 줬는데 exceptionOnUnreadXml()을 false 값으로 지정해 주었다. 이 설정의 역할은 xml 데이터 파싱 시 모든 데이터를 파싱 하는 것이 아닌 일부 데이터를 파싱 하는 데 있어서 파싱 되지 않은 데이터가 존재할 때 이에 대해 Exception을 발생시키지 않음을 의미하는 설정이다.
APIClient.kt
object APIClient {
    const val BASE_URL = "https://news.google.com/"

    val retrofit = Retrofit.Builder()
        .baseUrl(BASE_URL)
        .addConverterFactory(TikXmlConverterFactory.create(
            TikXml.Builder()
                .exceptionOnUnreadXml(false) // 일부 xml만 파싱하기 때문에 이외 파싱이 안된 부분이 존재할 시 exception을 보내지 않도록 설정
                .build()
        ))
        .build()
}
다음으로 파싱 된 데이터를 받을 데이터 클래스를 생성한다. 파싱 할 항목으로 아래 밑줄 친 부분들을 가져와 활용할 예정이다. 이를 위해서 여러 개의 데이터 클래스가 필요하다. 아래와 같이 특정 태그만을 가져와 사용할 수 있는 건 앞서 말했다시피 TikXml의 exceptionOnUnreadXml() 값을 false로 지정했기 때문에 가능하다.
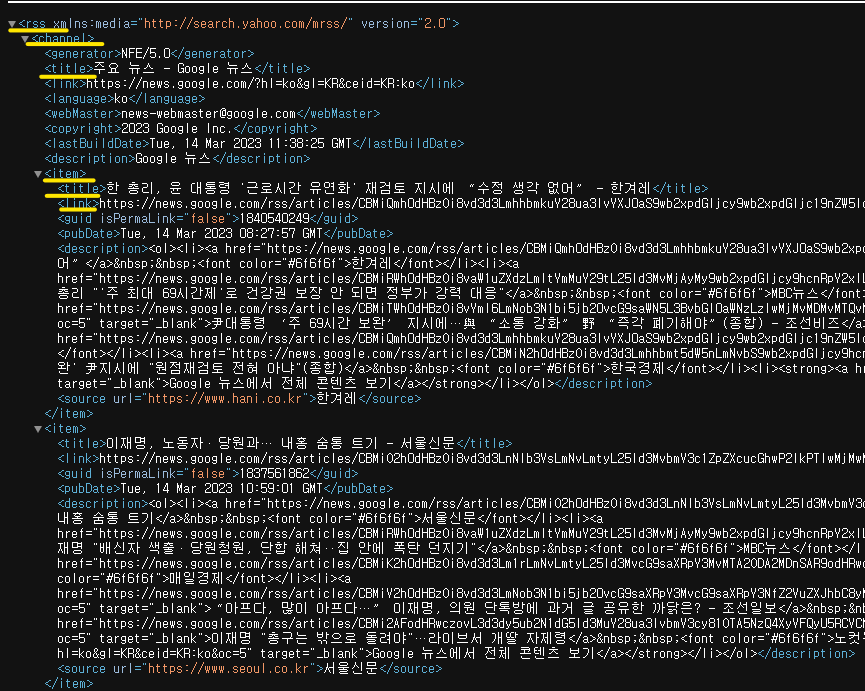
데이터 클래스의 어노테이션들은 각각 다음을 의미한다.
- @Xml: 클래스를 XML 루트 요소를 표시하는 데 사용
- @Element: 클래스 필드를 XML 요소를 표시하는 데 사용(하위 요소가 있음)
- @PropertyElement: 값이 하나만 있는, 즉 하위 요소를 포함하지 않는 XML 요소를 표시하는 데 사용
위 내용을 토대로 트리 구조의 XML 파일을 파싱할 준비를 해준다.
NewsRss.kt
@Xml(name = "rss")
data class NewsRss(
    @Element(name = "channel")
    val channel: RssChannel
)

@Xml(name = "channel")
data class RssChannel(
    @PropertyElement(name = "title")
    val title: String,
    @Element(name = "item")
    val items: List<NewsItem>? = null
)

@Xml(name = "item")
data class NewsItem(
    @PropertyElement(name = "title")
    val title: String? = null,
    @PropertyElement(name = "link")
    val link: String? = null,
)
다음으로 파싱할 데이터를 갖고 있는 주소를 호출하기 위한 NewsService 인터페이스를 작성한다. GET 어노테이션의 인자로 파싱할 데이터의 rss 형식을 갖고 있는 주소를 넣어준다. 해당 앱에서는 https://news.google.com/rss?hl=ko&gl=KR&ceid=KR:ko 주소로 이동하면 파일의 rss 형식의 xml 데이터를 표시하므로 인자로 넣어준다.
NewsService.kt
interface NewsService {
    @GET("rss?hl=ko&gl=KR&ceid=KR:ko")
    fun mainFeed(): Call<NewsRss>
}
이제 값을 잘 받아오는지 MainActivity에서 확인해 주도록 한다. Retrofit을 생성하여 변수에 넣어주고 해당 변수로 데이터를 가져오는 mainFeed() 메서드를 호출해 로그를 띄워 데이터를 잘 받아왔는지 확인한다.
MainActivity.kt
class MainActivity : AppCompatActivity() {
    private lateinit var binding: ActivityMainBinding
    override fun onCreate(savedInstanceState: Bundle?) {
        super.onCreate(savedInstanceState)
        binding = ActivityMainBinding.inflate(layoutInflater)
        setContentView(binding.root)

        val newsService = APIClient.retrofit.create(NewsService::class.java)
        newsService.mainFeed().enqueue(object : Callback<NewsRss> {
            override fun onResponse(call: Call<NewsRss>, response: Response<NewsRss>) {
                Log.e("MainActivity", response.body()?.channel?.items.toString())
            }

            override fun onFailure(call: Call<NewsRss>, t: Throwable) {
                t.printStackTrace()
            }

        })
    }
}

📔 가져온 데이터 RecyclerView로 구현
위의 가져온 뉴스의 제목 데이터를 사용하여 RecyclerView에 구현시켜 보도록 하자. activity_main.xml 파일에 RecyclerView를 생성해 준다.
activity_main.xml
<?xml version="1.0" encoding="utf-8"?>
<androidx.constraintlayout.widget.ConstraintLayout xmlns:android="http://schemas.android.com/apk/res/android"
    xmlns:app="http://schemas.android.com/apk/res-auto"
    xmlns:tools="http://schemas.android.com/tools"
    android:layout_width="match_parent"
    android:layout_height="match_parent"
    tools:context=".MainActivity">

    <androidx.recyclerview.widget.RecyclerView
        android:id="@+id/newsRecyclerView"
        android:layout_width="0dp"
        android:layout_height="0dp"
        app:layout_constraintBottom_toBottomOf="parent"
        app:layout_constraintEnd_toEndOf="parent"
        app:layout_constraintStart_toStartOf="parent"
        app:layout_constraintTop_toTopOf="parent"
        tools:listitem="@layout/item_news" />

</androidx.constraintlayout.widget.ConstraintLayout>
각각의 뉴스 아이템을 생성하기 위해 아이템 뷰를 위한 파일을 생성한다. 해당 파일에서 보기 좋은 UI를 위해 최상위 뷰를 CardView로 지정해 주었다. CardView를 사용하면 좀 더 보기 좋게 뷰를 구성할 수 있다. 바로 CardView의 속성 때문인데 app:cardCornerRadius와 app:cardElevation 속성을 사용하여 UI를 구성해 보도록 한다. 먼저 app:cardCornerRadius 속성은 CardView의 모서리를 곡선으로 만들어 준다. app:cardElevation은 CardView에 그림자를 적용시켜 입체감 있는 뷰를 만들어 준다.
CardView는 하나의 뷰만을 하위로 가질 수 있으므로 여기서 하위 뷰로 ConstraintLayout을 지정해 준다. ConstraintLayout의 하위에서 구성할 뷰들을 지정해 주도록 한다. 하위 뷰로 ImageView와 TextView를 사용한다.
item_news.xml
<?xml version="1.0" encoding="utf-8"?>
<androidx.cardview.widget.CardView xmlns:android="http://schemas.android.com/apk/res/android"
    xmlns:app="http://schemas.android.com/apk/res-auto"
    xmlns:tools="http://schemas.android.com/tools"
    android:layout_width="match_parent"
    android:layout_height="wrap_content"
    android:layout_margin="15dp"
    app:cardCornerRadius="8dp"
    app:cardElevation="5dp">

    <androidx.constraintlayout.widget.ConstraintLayout
        android:layout_width="match_parent"
        android:layout_height="wrap_content">

        <ImageView
            android:id="@+id/thumbnailImageView"
            android:layout_width="0dp"
            android:layout_height="0dp"
            android:background="@color/purple_200"
            android:scaleType="centerCrop"
            app:layout_constraintDimensionRatio="2:1"
            app:layout_constraintEnd_toEndOf="parent"
            app:layout_constraintStart_toStartOf="parent"
            app:layout_constraintTop_toTopOf="parent" />

        <TextView
            android:id="@+id/titleTextView"
            android:layout_width="0dp"
            android:layout_height="wrap_content"
            android:layout_marginTop="10dp"
            android:paddingHorizontal="15dp"
            android:paddingBottom="15dp"
            android:textColor="@color/black"
            android:textSize="18sp"
            android:textStyle="bold"
            app:layout_constraintEnd_toEndOf="parent"
            app:layout_constraintStart_toStartOf="parent"
            app:layout_constraintTop_toBottomOf="@id/thumbnailImageView"
            tools:text="기사 제목입니다." />

    </androidx.constraintlayout.widget.ConstraintLayout>

</androidx.cardview.widget.CardView>
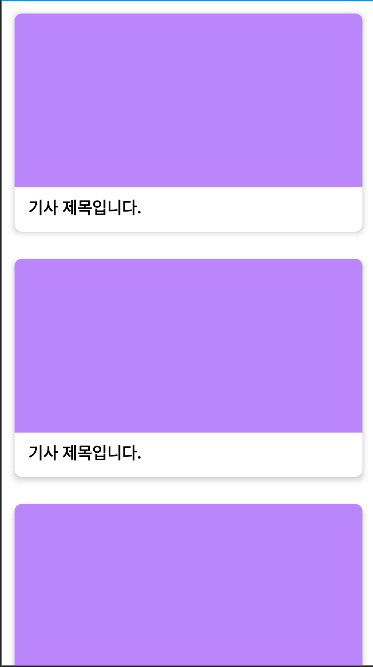
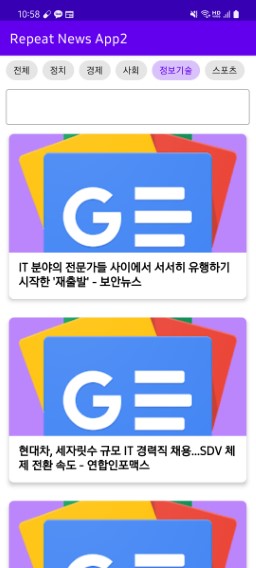
item_news.xml로 구성된 RecyclerView의 모습은 다음과 같다.
이제 해당 뷰에 데이터를 연결시켜 주도록 한다. 이를 위해 Adapter 클래스를 생성한다. 뷰에 연결된 데이터 클래스는 NewsItem이 사용되고 이를 위한 ViewHolder 클래스를 Adapter 클래스의 하위 클래스로 생성해 준다. 인자로 들어갈 DiffUtil 클래스는 companion object의 변수로 만들어 areItemsTheSame() 메서드는 아이템들이 참조하는 객체가 같은지 비교하고 areContentsTheSame() 메서드에서는 아이템의 내용이 같은지 비교하도록 재정의하여 반환한다.
NewsAdapter.kt
class NewsAdapter : ListAdapter<NewsItem, NewsAdapter.NewsViewHolder>(diffUtil) {

    override fun onCreateViewHolder(parent: ViewGroup, viewType: Int): NewsViewHolder {
        return NewsViewHolder(
            ItemNewsBinding.inflate(
                LayoutInflater.from(parent.context),
                parent,
                false
            )
        )
    }

    override fun onBindViewHolder(holder: NewsViewHolder, position: Int) {
        holder.bind(currentList[position])
    }

    inner class NewsViewHolder(private val binding: ItemNewsBinding) : RecyclerView.ViewHolder(binding.root) {
        fun bind(item: NewsItem) {
            binding.titleTextView.text = item.title

        }
    }

    companion object {
        val diffUtil = object : DiffUtil.ItemCallback<NewsItem>() {
            override fun areItemsTheSame(oldItem: NewsItem, newItem: NewsItem): Boolean {
                return oldItem === newItem
            }

            override fun areContentsTheSame(oldItem: NewsItem, newItem: NewsItem): Boolean {
                return oldItem == newItem
            }

        }
    }
}
MainActivity에서 Adapter를 생성해 주고 RecyclerView를 정의하여 각각 adapter와 layoutManager를 지정해 준다. 여기서 layoutManager로는 LinearLayoutManager를 사용한다. 그 후 콜백 메서드의 onResponse() 내부에 submitList()를 통해 받아온 데이터를 뷰에 표시하도록 한다.
class MainActivity : AppCompatActivity() {

    ...

    private lateinit var newsAdapter: NewsAdapter
    override fun onCreate(savedInstanceState: Bundle?) {

        ...

        newsAdapter = NewsAdapter()

        binding.newsRecyclerView.apply {
            adapter = newsAdapter
            layoutManager = LinearLayoutManager(this@MainActivity)
        }

        val newsService = APIClient.retrofit.create(NewsService::class.java)
        newsService.mainFeed().enqueue(object : Callback<NewsRss> {
            override fun onResponse(call: Call<NewsRss>, response: Response<NewsRss>) {
                Log.e("MainActivity", response.body()?.channel?.items.toString())

                newsAdapter.submitList(response.body()?.channel?.items)
            }

            override fun onFailure(call: Call<NewsRss>, t: Throwable) {
                t.printStackTrace()
            }

        })
    }
}
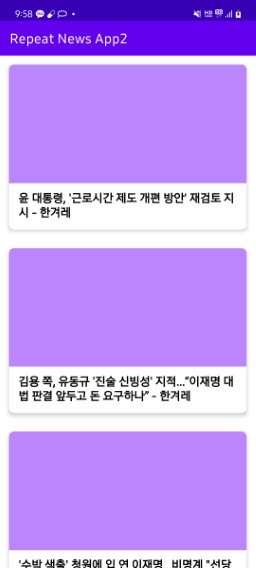
앱을 실행시켜 결과를 확인해 보면, 받아온 데이터가 뷰에 잘 표시되는 것을 볼 수 있다.
📔 뷰에 이미지 가져오기
기존 뉴스의 rss 형식의 xml 데이터에서는 이미지의 url를 표시하는 태그가 없어 이미지 데이터를 가져오지는 못했다. 이미지 데이터를 가져오기 위해서는 해당 뉴스의 원본 사이트에서 메타 데이터를 통해 이미지를 가져와야 한다. 이때 필요한 라이브러리가 Jsoup 라이브러리다. 또한 이미지 파싱을 위해서 Glide 라이브러리 또한 추가해 주도록 한다.
app:build.gradle
// jsoup
implementation 'org.jsoup:jsoup:1.15.4'

// glide
implementation 'com.github.bumptech.glide:glide:4.15.0'
기존 데이터 클래스인 NewsItem 클래스는 이미지 속성을 가지고 있지 않으므로 이미지 데이터를 포함한 뉴스 정보를 가지는 데이터 클래스를 NewsModel 이라는 이름으로 새로 생성해 주도록 한다. 이때 기존의 NewsItem의 속성들을 가져와 NewsModel 클래스에 넣어 주도록 한다. 넣어주는 방법으로 확장 함수를 사용한다. 확장 함수로 List
NewsModel
data class NewsModel(
    val title: String,
    val link: String,
    var imageUrl: String? = null
)

fun List<NewsItem>.transform(): List<NewsModel> {
    return this.map {
        NewsModel(
            title = it.title ?: "",
            link = it.link ?: "",
            imageUrl = null
        )
    }
}
이제 MainActivity에서 해당 함수를 적용시키도록 하자. onResponse() 메서드 내부에서 “list”라는 변수를 만들어 기존에 데이터를 받아온 response에 확장 함수를 적용시켜 변수에 대입하도록 한다. 이렇게 하면 받아온 데이터들을 NewsModel에 추가할 수 있다. “list” 변수를 “newsAdapter”의 submitList() 메서드에 인자로 넣으면 이전처럼 뉴스 제목에 대한 정보는 추가된다.
MainActivity.kt
newsService.mainFeed().enqueue(object : Callback<NewsRss> {
    override fun onResponse(call: Call<NewsRss>, response: Response<NewsRss>) {

        val list = response.body()?.channel?.items.orEmpty().transform()
        newsAdapter.submitList(list)

    }

    override fun onFailure(call: Call<NewsRss>, t: Throwable) {
        t.printStackTrace()
    }

})
submitList() 아래에 “list”를 forEachIndexed 함수를 적용하여 블록을 열어주고 Jsoup 라이브러리는 네트워크 작업을 수행하므로 스레드를 열어준다. 스레드 내부에서 try~catch 문을 작성하고 try 블록 내부에 Jsoup 라이브러리를 사용하여 뉴스의 링크를 연결시킨 것을 변수 “jsoup”에 저장하도록 한다. 그리고 가져온 링크의 메타 데이터를 검색한다. 적용하고자 하는 이미지 url이 담긴 메타 데이터의 태그의 내용은 다음과 같다.

위 내용을 가져오기 위해 “jsoup” 변수의 select() 메서드를 사용해 이미지를 갖고 있는 태그를 검색하는데, 이때 검색에 사용되는 쿼리문은 css 쿼리를 사용한다. “meta[property^=og:]” 쿼리를 검색하는데 이는 “meta” 태그의 “=og:” 로 시작하는 “property” 변수를 의미한다. select() 메서드로 검색된 태그들은 “elements”라는 변수에 저장하고 이 “elements” 변수에서 find 함수를 사용해 “og:image”라는 이름의 “property”를 찾아 이를 또 변수 “ogImageNode”에 저장한다.
마지막으로 “og:image” 이름을 가진 이미지의 url은 “content”로 지정하므로 앞서 만들어 두었던 NewsModel의 “imageUrl”에 url을 넣어주도록 하면 된다. 이로써 이미지를 받아오는 과정은 끝이다. forEachIndexed 함수를 사용했으므로 받아온 이미지를 newsAdapter.notifyItemChanged에 인덱스를 넣어 적용해 주면 이미지를 가져온다.
MainActivity.kt
class MainActivity : AppCompatActivity() {

    ...

    override fun onCreate(savedInstanceState: Bundle?) {

        ...

        newsService.mainFeed().enqueue(object : Callback<NewsRss> {
            override fun onResponse(call: Call<NewsRss>, response: Response<NewsRss>) {

                val list = response.body()?.channel?.items.orEmpty().transform()
                newsAdapter.submitList(list)

                list.forEachIndexed { index, news ->
                    Thread {

                        try {
                            val jsoup = Jsoup.connect(news.link).get()
                            val elements =
                                jsoup.select("meta[property^=og:]") // meta 태그의 =og: 로 시작하는 property
                            val ogImageNode = elements.find { node ->
                                node.attr("property") == "og:image"
                            }

                            news.imageUrl = ogImageNode?.attr("content")

                        } catch (e: Exception) {
                            e.printStackTrace()
                        }

                        runOnUiThread {
                            newsAdapter.notifyItemChanged(index)
                        }

                    }.start()

                }

            }

            override fun onFailure(call: Call<NewsRss>, t: Throwable) {
                t.printStackTrace()
            }

        })
    }
}
결과를 확인하기 전에 뉴스의 기존 사이트의 주소가 http로 시작할 수 있으므로 매니페스트 파일에서 usesCleartextTraffic을 true로 지정해 주어야 한다.
AndroidManifest.xml
<application

    ...

    android:usesCleartextTraffic="true"

    ...

    >
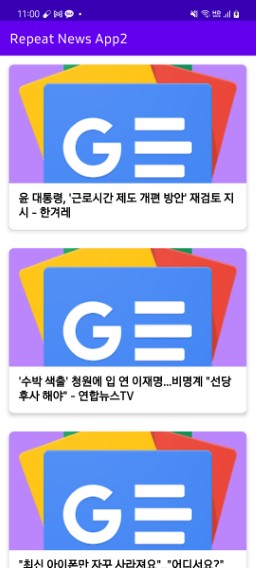
결과를 확인하면 뉴스 이미지 대신 구글 이미지가 적용된 것을 볼 수 있는데, Google News 에서 og:image 를 일괄로 Google News 로고로 변경하였기 때문이다. 하지만 해당 이미지가 나온 것은 정상적으로 이미지 url을 받아왔음을 의미하므로 이 점 유의하도록 하자.
📔 분야별 뉴스 탭 구현
화면 상단에 분야별 탭으로 구성하여 뉴스를 볼 수 있도록 구현해 보자. 해당 기능을 위해서 머터리얼 컴포넌트인 Chip을 사용한다. xml 파일에서 수평 스크롤을 위해 HorizontalScrollView를 상위 뷰로 구현해 주고 내부에 각각의 분야를 가리키는 Chip들을 관리하는 ChipGroup을 생성해 준다. ChipGroup 내부에서 각각의 Chip을 생성하여 정의한다.
activity_main.xml
<?xml version="1.0" encoding="utf-8"?>
<androidx.constraintlayout.widget.ConstraintLayout xmlns:android="http://schemas.android.com/apk/res/android"
    xmlns:app="http://schemas.android.com/apk/res-auto"
    xmlns:tools="http://schemas.android.com/tools"
    android:layout_width="match_parent"
    android:layout_height="match_parent"
    tools:context=".MainActivity">

    <HorizontalScrollView
        android:id="@+id/chipGroupScrollView"
        android:layout_width="0dp"
        android:layout_height="wrap_content"
        app:layout_constraintEnd_toEndOf="parent"
        app:layout_constraintStart_toStartOf="parent"
        app:layout_constraintTop_toTopOf="parent">

        <com.google.android.material.chip.ChipGroup
            android:id="@+id/chipGroup"
            android:layout_width="wrap_content"
            android:layout_height="wrap_content"
            android:paddingHorizontal="10dp">

            <com.google.android.material.chip.Chip
                android:id="@+id/feedChip"
                style="@style/Widget.MaterialComponents.Chip.Choice"
                android:layout_width="wrap_content"
                android:layout_height="wrap_content"
                android:checked="true"
                android:text="@string/feed" />

            <com.google.android.material.chip.Chip
                android:id="@+id/politicsChip"
                style="@style/Widget.MaterialComponents.Chip.Choice"
                android:layout_width="wrap_content"
                android:layout_height="wrap_content"
                android:text="@string/politics" />

            <com.google.android.material.chip.Chip
                android:id="@+id/economyChip"
                style="@style/Widget.MaterialComponents.Chip.Choice"
                android:layout_width="wrap_content"
                android:layout_height="wrap_content"
                android:text="@string/economy" />

            <com.google.android.material.chip.Chip
                android:id="@+id/societyChip"
                style="@style/Widget.MaterialComponents.Chip.Choice"
                android:layout_width="wrap_content"
                android:layout_height="wrap_content"
                android:text="@string/society" />

            <com.google.android.material.chip.Chip
                android:id="@+id/itChip"
                style="@style/Widget.MaterialComponents.Chip.Choice"
                android:layout_width="wrap_content"
                android:layout_height="wrap_content"
                android:text="@string/it" />

            <com.google.android.material.chip.Chip
                android:id="@+id/sportChip"
                style="@style/Widget.MaterialComponents.Chip.Choice"
                android:layout_width="wrap_content"
                android:layout_height="wrap_content"
                android:text="@string/sport" />

        </com.google.android.material.chip.ChipGroup>

    </HorizontalScrollView>

    <androidx.recyclerview.widget.RecyclerView
        android:id="@+id/newsRecyclerView"
        android:layout_width="0dp"
        android:layout_height="0dp"
        app:layout_constraintBottom_toBottomOf="parent"
        app:layout_constraintEnd_toEndOf="parent"
        app:layout_constraintStart_toStartOf="parent"
        app:layout_constraintTop_toBottomOf="@id/chipGroupScrollView"
        tools:listitem="@layout/item_news" />

</androidx.constraintlayout.widget.ConstraintLayout>
각각의 분야별로 뉴스를 조회하기 위해서 NewsService 파일에서 해당 분야의 뉴스의 url을 통해 조회하는 메서드를 작성한다. 여기서도 마찬가지로 Call
NewsService.kt
interface NewsService {

    @GET("rss?hl=ko&gl=KR&ceid=KR:ko")
    fun mainFeed(): Call<NewsRss>

    @GET("rss/topics/CAAqIQgKIhtDQkFTRGdvSUwyMHZNRFZ4ZERBU0FtdHZLQUFQAQ?hl=ko&gl=KR&ceid=KR%3Ako")
    fun politicsNews(): Call<NewsRss>

    @GET("rss/topics/CAAqIggKIhxDQkFTRHdvSkwyMHZNR2RtY0hNekVnSnJieWdBUAE?hl=ko&gl=KR&ceid=KR%3Ako")
    fun economyNews(): Call<NewsRss>

    @GET("rss/topics/CAAqIQgKIhtDQkFTRGdvSUwyMHZNRGs0ZDNJU0FtdHZLQUFQAQ?hl=ko&gl=KR&ceid=KR%3Ako")
    fun societyNews(): Call<NewsRss>

    @GET("rss/topics/CAAqIQgKIhtDQkFTRGdvSUwyMHZNRE41ZEdNU0FtdHZLQUFQAQ?hl=ko&gl=KR&ceid=KR%3Ako")
    fun itNews(): Call<NewsRss>

    @GET("rss/topics/CAAqJggKIiBDQkFTRWdvSUwyMHZNRFp1ZEdvU0FtdHZHZ0pMVWlnQVAB?hl=ko&gl=KR&ceid=KR%3Ako")
    fun sportNews(): Call<NewsRss>
}
NewsService의 모든 메서드의 공통점을 Call
MainActivity.kt
private fun Call<NewsRss>.submitList() {
    enqueue(object : Callback<NewsRss> {
        override fun onResponse(call: Call<NewsRss>, response: Response<NewsRss>) {

            val list = response.body()?.channel?.items.orEmpty().transform()
            newsAdapter.submitList(list)

            list.forEachIndexed { index, news ->
                Thread {

                    try {
                        val jsoup = Jsoup.connect(news.link).get()
                        val elements =
                            jsoup.select("meta[property^=og:]") // meta 태그의 =og: 로 시작하는 property
                        val ogImageNode = elements.find { node ->
                            node.attr("property") == "og:image"
                        }

                        news.imageUrl = ogImageNode?.attr("content")

                    } catch (e: Exception) {
                        e.printStackTrace()
                    }

                    runOnUiThread {
                        newsAdapter.notifyItemChanged(index)
                    }

                }.start()
            }
        }

        override fun onFailure(call: Call<NewsRss>, t: Throwable) {
            t.printStackTrace()
        }

    })
}
위 메서드를 토대로 각각의 탭이 선택되면 해당 메서드를 호출해 주고 이와 더불어 미리 체크되어 있는 탭을 다시 비활성화하도록 chipGroup.clearCheck()와 선택된 탭을 체크하도록 설정해 준다.
class MainActivity : AppCompatActivity() {

    ...

    override fun onCreate(savedInstanceState: Bundle?) {
        super.onCreate(savedInstanceState)
        binding = ActivityMainBinding.inflate(layoutInflater)
        setContentView(binding.root)

        val newsService = APIClient.retrofit.create(NewsService::class.java)

        ...

        binding.feedChip.setOnClickListener {
            binding.chipGroup.clearCheck()
            binding.feedChip.isChecked = true

            newsService.mainFeed().submitList()
        }

        binding.politicsChip.setOnClickListener {
            binding.chipGroup.clearCheck()
            binding.politicsChip.isChecked = true

            newsService.politicsNews().submitList()
        }

        binding.economyChip.setOnClickListener {
            binding.chipGroup.clearCheck()
            binding.economyChip.isChecked = true

            newsService.economyNews().submitList()
        }

        binding.societyChip.setOnClickListener {
            binding.chipGroup.clearCheck()
            binding.societyChip.isChecked = true

            newsService.societyNews().submitList()
        }

        binding.itChip.setOnClickListener {
            binding.chipGroup.clearCheck()
            binding.itChip.isChecked = true

            newsService.itNews().submitList()
        }

        binding.sportChip.setOnClickListener {
            binding.chipGroup.clearCheck()
            binding.sportChip.isChecked = true

            newsService.sportNews().submitList()
        }


        newsService.mainFeed().submitList()
    }

    ...

}
결과를 확인하면 아래와 같이 탭에 따라 각각의 분야별 뉴스를 정상적으로 조회해 표시하는 것을 볼 수 있다.
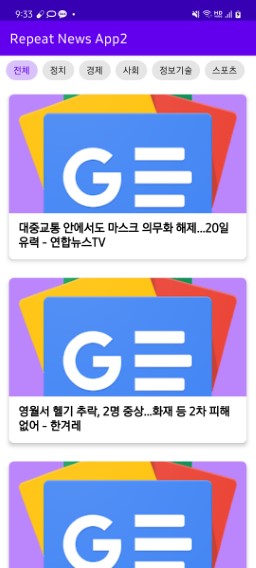
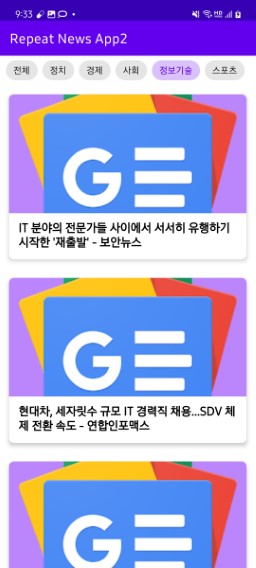
📔 뉴스 검색 기능 구현
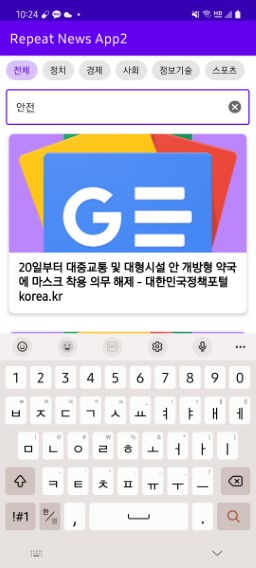
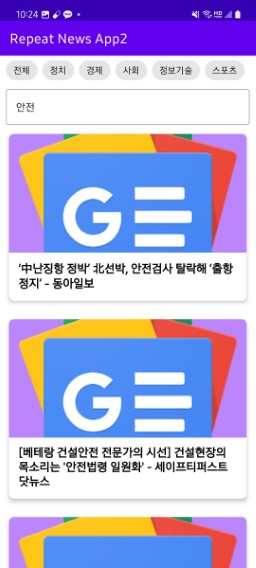
EditText를 만들어 키워드를 입력하여 해당하는 뉴스를 검색하도록 구현해 보자. 우선 xml 파일에 EditText를 생성해 주는데 이번에는 TextInputLayout과 함께 사용한다. TextInputLayout에서 구현한 속성은 우선 style="@style/Widget.MaterialComponents.TextInputLayout.OutlinedBox" 을 사용하여 EditText의 UI에 테두리가 생겨 보다 깔끔한 디자인으로 구현되게 했다. 또한 app:endIconMode="clear_text"를 사용해 EditText에 키워드가 입력되면 우측 끝단에 x 버튼이 생겨 적어놓은 키워드를 삭제시킬 수 있도록 설정해 주었다.
EditText의 속성은 android:imeOptions="actionSearch"으로 키워드 입력 시 구현되는 키보드에서 우측 하단 버튼의 모양을 검색 버튼으로 설정해 주었다.
activity_main.xml
<?xml version="1.0" encoding="utf-8"?>
<androidx.constraintlayout.widget.ConstraintLayout xmlns:android="http://schemas.android.com/apk/res/android"
    xmlns:app="http://schemas.android.com/apk/res-auto"
    xmlns:tools="http://schemas.android.com/tools"
    android:layout_width="match_parent"
    android:layout_height="match_parent"
    tools:context=".MainActivity">

    ...

    <com.google.android.material.textfield.TextInputLayout
        android:id="@+id/textInputLayout"
        style="@style/Widget.MaterialComponents.TextInputLayout.OutlinedBox"
        android:layout_width="match_parent"
        android:layout_height="wrap_content"
        android:layout_marginHorizontal="10dp"
        app:endIconMode="clear_text"
        app:layout_constraintTop_toBottomOf="@id/chipGroupScrollView">

        <com.google.android.material.textfield.TextInputEditText
            android:id="@+id/searchTextInputEditText"
            android:layout_width="match_parent"
            android:layout_height="wrap_content"
            android:imeOptions="actionSearch"
            android:inputType="text"
            android:maxLines="1"
            tools:text="테스트" />

    </com.google.android.material.textfield.TextInputLayout>

    ...

</androidx.constraintlayout.widget.ConstraintLayout>
다음으로 NewsService 파일에서 검색을 위한 메서드를 작성해 준다.
NewsService.kt
interface NewsService {

    ...

    @GET("rss/search?hl=ko&gl=KR&ceid=KR%3Ako")
    fun search(@Query("q") query: String): Call<NewsRss>
}
MainActivity에서 “searchTextInputEditText”의 setOnEditorActionListener를 호출해 준다. 해당 리스너는 사용자가 키보드에서 완료나 엔터 기능과 같은 동작을 수행할 때 호출된다. 따라서 해당 리스너가 호출되었을 때 기능이 검색 기능일 경우에 동작을 처리해 주면 된다. 처리할 동작으로 “chipGroup”의 체크를 해제하고, “searchTextInputEditText”의 포커스를 해제하며, 표시된 키보드를 다시 내려주도록 설정해 준다. 마지막으로 검색을 수행하는 메서드를 호출하도록 한다. 해당 리스너는 Boolean 값을 반환해야 하므로 성공적으로 동작을 완료한 경우 true 반환하도록 했다.
MainActivity.kt
class MainActivity : AppCompatActivity() {

    ...

    override fun onCreate(savedInstanceState: Bundle?) {

        ...

        binding.searchTextInputEditText.setOnEditorActionListener { view, actionId, event ->
            if (actionId == EditorInfo.IME_ACTION_SEARCH) {
                binding.chipGroup.clearCheck()

                binding.searchTextInputEditText.clearFocus()
                val imm = getSystemService(Context.INPUT_METHOD_SERVICE) as InputMethodManager
                imm.hideSoftInputFromWindow(view.windowToken, 0)

                newsService.search(binding.searchTextInputEditText.text.toString()).submitList()

                return@setOnEditorActionListener true
            }
            return@setOnEditorActionListener false
        }

        ...

    }

}
📔 뉴스 카드 클릭 시, 해당 뉴스 사이트로 이동 기능 구현
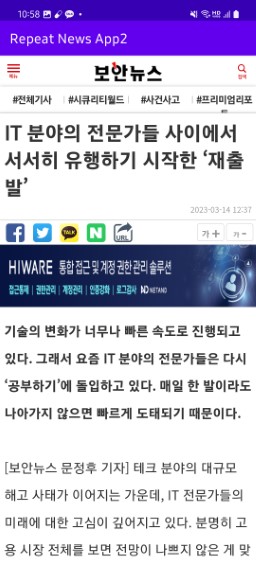
뉴스 카드를 클릭하면 해당 뉴스의 링크를 통해 웹뷰에서 뉴스를 표시하도록 구현해 보자. 이를 위해 먼저 WebViewActivity로 새로운 액티비티를 생성해 준다. 새로 생성한 액티비티의 xml 파일은 간단하게 웹뷰로만 구성해 주었다.
activity_web_view.xml
<?xml version="1.0" encoding="utf-8"?>
<androidx.constraintlayout.widget.ConstraintLayout xmlns:android="http://schemas.android.com/apk/res/android"
    xmlns:app="http://schemas.android.com/apk/res-auto"
    xmlns:tools="http://schemas.android.com/tools"
    android:layout_width="match_parent"
    android:layout_height="match_parent"
    tools:context=".WebViewActivity">

    <WebView
        android:id="@+id/newsWebView"
        android:layout_width="match_parent"
        android:layout_height="match_parent" />

</androidx.constraintlayout.widget.ConstraintLayout>
카드를 클릭했을 때 Intent에 뉴스 링크를 보내 이동해야 하므로 Adapter 클래스에 클릭 리스너를 설정해 준다.
NewsAdapter.kt
class NewsAdapter(
    private val onClick: (String) -> Unit
) : ListAdapter<NewsModel, NewsAdapter.NewsViewHolder>(diffUtil) {

    ...

    inner class NewsViewHolder(private val binding: ItemNewsBinding) : RecyclerView.ViewHolder(binding.root) {
        fun bind(item: NewsModel) {
            binding.titleTextView.text = item.title

            Glide.with(binding.thumbnailImageView)
                .load(item.imageUrl)
                .into(binding.thumbnailImageView)

            binding.root.setOnClickListener {
                onClick(item.link)
            }
        }
    }

    ...

}
MainActivity에서 클릭 시 기능할 동작을 지정해 준다. 여기서는 Intent를 사용해 url을 넘겨준다.
MainActivity.kt
class MainActivity : AppCompatActivity() {

    ...

    override fun onCreate(savedInstanceState: Bundle?) {

        ...

        newsAdapter = NewsAdapter {
            startActivity(
                Intent(
                    this,
                    WebViewActivity::class.java
                ).apply {
                    putExtra("url", it)
                }
            )
        }

        ...

    }

    ...

}
WebViewActivity에서 Intent로 넘어온 값을 변수에 지정해 주고 웹뷰에 넣어주면 된다. 이를 위해 WebViewClient()를 생성하고 자바스크립트 동작을 허용해 주었다.
WebViewActivity.kt
class WebViewActivity : AppCompatActivity() {
    private lateinit var binding: ActivityWebViewBinding
    override fun onCreate(savedInstanceState: Bundle?) {
        super.onCreate(savedInstanceState)
        binding = ActivityWebViewBinding.inflate(layoutInflater)
        setContentView(binding.root)

        val url = intent.getStringExtra("url")

        binding.newsWebView.webViewClient = WebViewClient()
        binding.newsWebView.settings.javaScriptEnabled = true

        if (url.isNullOrEmpty()) {
            Toast.makeText(this, "잘못된 주소입니다.", Toast.LENGTH_SHORT).show()
            finish()
        } else {
            binding.newsWebView.loadUrl(url)
        }
    }
}
뉴스 기사가 잘 표시되는 것을 볼 수 있다.
📔 뉴스 정보가 없을 경우, NotFound 애니메이션 표시
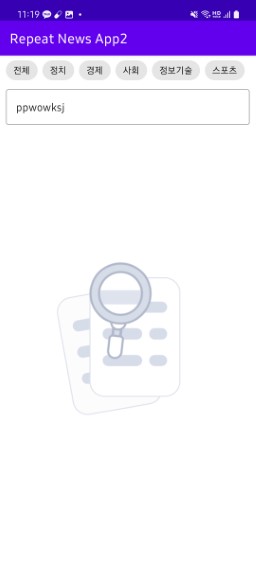
검색한 뉴스 결과가 존재하지 않을 때, 애니메이션을 활용하여 이를 표시해 보도록 하자. 이를 위해 사용할 라이브러리는 Lottie 라이브러리이다. Lottie 라이브러리를 사용하면 Lottie 애니메이션 사이트에서 다운받은 애니메이션을 앱에서 쉽게 구현할 수 있다.
Lottie 라이브러리를 build.gradle 파일에 추가해 준다.
app:build.gradle
// lottie
implementation "com.airbnb.android:lottie:6.0.0"
activity_main 파일에서 LottieAnimationView 위젯을 생성해 준다. 속성으로 app:lottie_autoPlay="true" 그리고 app:lottie_loop="true" 을 사용하였는데 각각 자동 재생과 반복 재생을 허용함을 의미한다. 적용할 애니메이션 파일은 raw 리소스 폴더를 새로 만들어 해당 폴더에 저장해 주었다.
activity_main.xml
<?xml version="1.0" encoding="utf-8"?>
<androidx.constraintlayout.widget.ConstraintLayout xmlns:android="http://schemas.android.com/apk/res/android"
    xmlns:app="http://schemas.android.com/apk/res-auto"
    xmlns:tools="http://schemas.android.com/tools"
    android:layout_width="match_parent"
    android:layout_height="match_parent"
    tools:context=".MainActivity">

    ...

    <com.airbnb.lottie.LottieAnimationView
        android:id="@+id/notFoundView"
        android:layout_width="0dp"
        android:layout_height="0dp"
        android:visibility="gone"
        app:layout_constraintBottom_toBottomOf="parent"
        app:layout_constraintEnd_toEndOf="parent"
        app:layout_constraintStart_toStartOf="parent"
        app:layout_constraintTop_toBottomOf="@id/textInputLayout"
        app:lottie_autoPlay="true"
        app:lottie_loop="true"
        app:lottie_rawRes="@raw/notfound" />

</androidx.constraintlayout.widget.ConstraintLayout>
MainActivity의 Call<NewsRss>.submitList() 메서드 내부에서 표시 여부를 정해주면 된다. response 값을 받아온 “list” 변수가 빈 값이라면 데이터가 없거나 받아오지 않았음을 의미하므로 해당 값을 boolean으로 하여 표시 여부를 결정한다.
MainActivity.kt
class MainActivity : AppCompatActivity() {

    ...

    private fun Call<NewsRss>.submitList() {
        enqueue(object : Callback<NewsRss> {
            override fun onResponse(call: Call<NewsRss>, response: Response<NewsRss>) {

                val list = response.body()?.channel?.items.orEmpty().transform()
                newsAdapter.submitList(list)

                binding.notFoundView.isVisible = list.isEmpty()

                    ...

            }
        })
    }
}
결과를 보면 입력된 값에 대한 기사가 존재하지 않을 경우, 결과 없음을 의미하는 애니메이션을 표시하는 것을 볼 수 있다.
📔전체 코드
https://github.com/Becomeproo/news_app
📔마무리
이번 앱을 진행하며 상황에 맞게 적절히 확장 함수를 사용하면 보다 쉽고 편리하게 코드를 구성할 수 있음을 알았다. 또한 Retrofit을 적용하는 부분에 있어서 이전보다 이해하기 쉬웠고 여러 번 연습해 보니 오히려 어렵다기보다는 앱을 구현하기 쉽게 만든 라이브러리임을 느꼈다. 이번에는 여러 라이브러리를 사용했는데 정말 편리하고 쉽게 앱을 만들 수 있다는 사실에 감탄하면서도 무리하게 라이브러리를 구성하게 되면 라이브러리 간의 버전으로 인해 오히려 앱을 유지하는 데 있어서 부정적인 영향을 끼칠 수 있을 것 같다는 느낌을 받았고, 만일 사용하더라도 구조를 잘 이해해서 사용해야겠다고 생각하게 되었다.