[Android] Part1-음악 재생 앱
아래 내용은 패스트 캠퍼스 [35개 프로젝트로 배우는 Android 앱 개발 feat. Jetpack Compose]의 강의 내용을 기반으로 작성한 자습 기록입니다.
음악 플레이어 앱
ℹ️앱 설명
음악을 재생, 정지 및 종료할 수 있는 기능을 가진 음악 플레이어 앱
✅구현 기능
- MediaPlayer를 이용한 음원 재생
- Service를 이용한 백그라운드 음원 재생
- Notification에 음원 컨트롤러 제공
✅사용되는 기능
- Android
- MediaPlayer
- Service
- Notification
- PendingIntent
- Intent flag
📔UI 구현 - 재생, 정지, 종료 버튼 UI 구현
앱에서 음악을 재생하기 위한 기능은 크게 세 가지이다.
- 재생
- 정지
- 종료
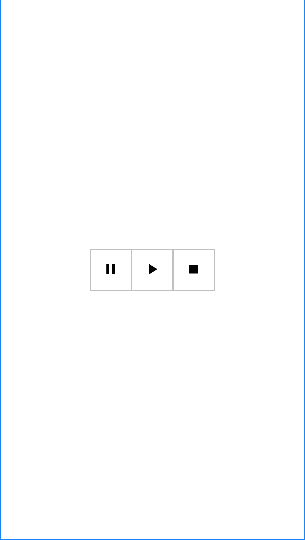
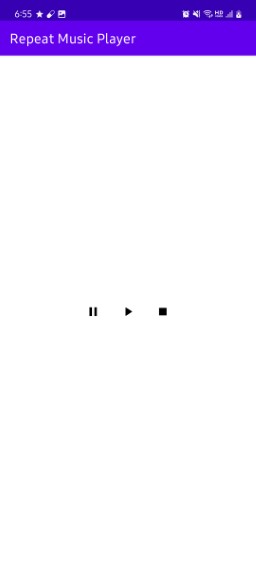
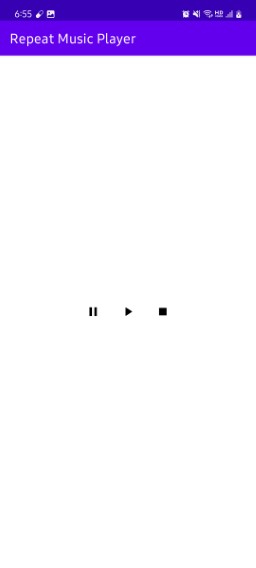
위 세 가지를 구현하기 위해 각각의 기능에 해당하는 이미지 세 개를 가져와 drawable 파일에 넣어주었다. 그리고 세 개의 버튼을 위해 ImageView를 세 개 만들어 주었고, Flow를 사용하여 세 개의 이미지를 정렬하여 중앙에 배치시켜 간단한 UI를 구성하였다.
activity_main.xml
<?xml version="1.0" encoding="utf-8"?>
<androidx.constraintlayout.widget.ConstraintLayout xmlns:android="http://schemas.android.com/apk/res/android"
    xmlns:app="http://schemas.android.com/apk/res-auto"
    xmlns:tools="http://schemas.android.com/tools"
    android:layout_width="match_parent"
    android:layout_height="match_parent"
    tools:context=".MainActivity">

    <androidx.constraintlayout.helper.widget.Flow
        android:layout_width="wrap_content"
        android:layout_height="wrap_content"
        app:constraint_referenced_ids="mediaPauseButton, mediaPlayButton, mediaStopButton"
        app:layout_constraintBottom_toBottomOf="parent"
        app:layout_constraintEnd_toEndOf="parent"
        app:layout_constraintStart_toStartOf="parent"
        app:layout_constraintTop_toTopOf="parent" />

    <ImageView
        android:id="@+id/mediaPlayButton"
        android:layout_width="wrap_content"
        android:layout_height="wrap_content"
        android:padding="16dp"
        android:src="@drawable/ic_baseline_play_arrow_24"
        tools:ignore="MissingConstraints" />

    <ImageView
        android:id="@+id/mediaPauseButton"
        android:layout_width="wrap_content"
        android:layout_height="wrap_content"
        android:padding="16dp"
        android:src="@drawable/ic_baseline_pause_24" />

    <ImageView
        android:id="@+id/mediaStopButton"
        android:layout_width="wrap_content"
        android:layout_height="wrap_content"
        android:padding="16dp"
        android:src="@drawable/ic_baseline_stop_24"
        tools:ignore="MissingConstraints" />

</androidx.constraintlayout.widget.ConstraintLayout>

📔기능 구현 - 음악 재성, 정지, 종료 기능 구현
음악을 재생시키기 위해서는 MediaPlayer를 사용한다. MediaPlayer를 구현하는 방법은 크게 어렵지 않다. 우선 세 가지 버튼에 맞게 각각의 기능을 수행하기 위해 클릭 리스너를 통해 메서드를 등록해 주었다.
MainActivity.kt
override fun onCreate(savedInstanceState: Bundle?) {
    super.onCreate(savedInstanceState)
    binding = ActivityMainBinding.inflate(layoutInflater)
    setContentView(binding.root)

    binding.mediaPlayButton.setOnClickListener {
        mediaPlayerPlay()
    }
    binding.mediaPauseButton.setOnClickListener {
        mediaPlayerPause()
    }
    binding.mediaStopButton.setOnClickListener {
        mediaPlayerStop()
    }
}
전체 영역에서 사용할 예정이기 때문에 MediaPlayer를 클래스 변수로 선언한다. 초깃값은 null로 지정한다.
class MainActivity : AppCompatActivity() {
    private lateinit var binding: ActivityMainBinding
    private var mediaPlayer: MediaPlayer? = null

    ...

}
MediaPlayer의 생성은 “play” 버튼을 눌렀을 때 생성되어야 하므로 mediaPlayerPlay() 메서드에 구현한다. MediaPlayer.create()를 사용해 생성하고 인자로 현재 컨텍스트와 raw 리소스 폴더를 생성해 미리 등록해둔 mp3 파일을 넣어준다. 생성된 MediaPlayer를 실행하기 위해 start() 메서드를 사용한다.
private fun mediaPlayerPlay() {
    if (mediaPlayer == null) {
        mediaPlayer = MediaPlayer.create(this, R.raw.it_was_a_time)
    }
    mediaPlayer?.start()
}
정지 버튼을 눌렀을 경우네는 pause() 메서드를 사용하여 음원을 정지시킬 수 있다.
private fun mediaPlayerPause() {
    mediaPlayer?.pause()
}
종료 기능 또한 마찬가지로 stop() 메서드를 호출하면 되고 종료가 수행될 시에는 등록된 MediaPlayer가 해제되어야 하고 해제가 되었다면 null 값으로 지정해 메모리도 비워주는 게 좋다. 따라서 해제를 위해 release() 메서드를, 이후 null 값으로 초기화 시켜준다.
private fun mediaPlayerStop() {
    mediaPlayer?.stop()
    mediaPlayer?.release()
    mediaPlayer = null
}
확인된 결과를 올리려고 했으나 블로그에 올릴 수 없는 것을 깨달았다. 실행하여 확인해 보면 잘 구현된 것을 알 수 있다.
이번에는 앱이 포그라운드 상에서 벗어났을 때에도 음원이 계속 재생될 수 있도록 구현해 보자. 해당 기능을 구현하기 위해서는 백그라운드에서 실행되어야 하는데 이는 서비스를 사용해야 한다. 서비스를 사용하여 백그라운드에서 해당 앱이 기능하도록 구현해 보자.
📔기능 구현 - 백그라운드에서 음원 재성 구현
서비스를 사용하기 위해서 서비스를 새로 만들어 주어야 한다. 액티비티를 새로 생성하는 것과 마찬가지로 new -> Service -> Service 를 통해 MediaPlayerService라는 이름의 서비스를 생성해 주었다. 이렇게 하면 Manifest 파일에 직접적으로 선언하지 않아도 자동으로 서비스가 추가되어 있는 것을 볼 수 있다. 여기서 android:exported 속성은 외부 앱에서도 해당 서비스를 사용할지에 대한 여부를 의미하며, 굳이 공유될 필요가 없기 때문에 false로 지정해 주었다.

서비스에서 필수적으로 구현해 주어야 할 재정의 메서드는 onStartCommand()이다. 서비스가 실행되고 난 후 받아온 인텐트에 대해 처리하는 메서드로 필수적으로 구현되어야 한다. 해당 메서드에서 MainActivity에서 보낸 intent를 처리하기 위해 분기문으로 나누어 각각 재생, 정지, 종료 기능을 수행하도록 선언해 주었다. 여기서 서비스 생성 시 같이 생성된 onBind() 메서드는 바인드 서비스가 아닌 포그라운드 서비스를 다루기 때문에 null 값을 반환하도록 해준다.
MediaPlayerService.kt
override fun onBind(intent: Intent): IBinder? {
    return null
}

override fun onStartCommand(intent: Intent?, flags: Int, startId: Int): Int {
    when (intent?.action) {
        MEDIA_PLAYER_PLAY -> {
            mediaPlayerPlay()
        }
        MEDIA_PLAYER_PAUSE -> {
            mediaPlayerPause()
        }
        MEDIA_PLAYER_STOP -> {
            mediaPlayerStop()
        }
    }

    return super.onStartCommand(intent, flags, startId)
}
위해서 인텐트 객체를 받아왔는데 이는 MainActivity에서 보낸 것이다. MainActivity에서 백그라운드에서 앱을 실행할 것이므로 앞서 작성해 두었던 코드는 서비스에서 작성될 것이다. 따라서 파일 내에 명시해 두었던 코드들은 지워주도록 한다. 대신 인텐트 객체를 생성하여 서비스에서 수행될 action 값을 설정해 주고 startService()에 인텐트 객체를 넣어 서비스를 실행해 준다. 여기서 사용된 action 값들은 서비스에서도 받아와 사용하기 때문에 따로 Constant라는 이름의 파일을 만들어 상수로 지정해 두었다.
Constant.kt
const val MEDIA_PLAYER_PLAY = "play"
const val MEDIA_PLAYER_PAUSE = "pause"
const val MEDIA_PLAYER_STOP = "stop"
MainActivity.kt
private fun mediaPlayerPlay() {
    Intent(this, MediaPlayerService::class.java).apply {
        action = MEDIA_PLAYER_PLAY
        startService(this)
    }
}

private fun mediaPlayerPause() {
    Intent(this, MediaPlayerService::class.java).apply {
        action = MEDIA_PLAYER_PAUSE
        startService(this)
    }
}

private fun mediaPlayerStop() {
    Intent(this, MediaPlayerService::class.java).apply {
        action = MEDIA_PLAYER_STOP
        startService(this)
    }
}
다시 서비스로 돌아와 앞서 MainActivity에서 작성했던 MediaPlayer의 코드들을 그대로 사용한다. 여기서 mediaPlayerStop() 메서드의 stopSelf() 메서드는 서비스를 명시적으로 종료함을 의미하는 메서드이다. 이 메서드를 사용하지 않으면 생성된 서비스가 계속해서 실행된 채로 남아있기 때문에 명시적으로 종료할 필요가 있다.
MediaPlayerService.kt
class MediaPlayerService : Service() {
    private var mediaPlayer: MediaPlayer? = null

    ...

    private fun mediaPlayerPlay() {
        if (mediaPlayer == null) {
            mediaPlayer = MediaPlayer.create(baseContext, R.raw.it_was_a_time)
        }
        mediaPlayer?.start()
    }

    private fun mediaPlayerPause() {
        mediaPlayer?.pause()
    }

    private fun mediaPlayerStop() {
        mediaPlayer?.stop()
        mediaPlayer?.release()
        mediaPlayer = null
        stopSelf() // 서비스가 계속 돌아가기 때문에 명시적으로 종료
    }
}
앱을 실행해 보면, 앱이 포그라운드에서 벗어날 때에도 계속해서 음원이 재생되는 것을 알 수 있다.
📔기능 구현 - 상태바에서 음원 재생 기능 구현
⚠️오류
해당 기능을 구현하기 앞서 길고 긴 삽질을 하게 되었다. 분명 사용하게 될 요소들인 Notification과 PendingIntent에 관한 코드들에 이상이 없음에도 상태바에 음악 플레이어가 표시되지 않는 문제가 발생했다. 특별한 오류 표시도 없었기 때문에 어떤 부분에서 문제가 발생했는지 알아내는 것도 쉽지 않았다. 그 결과 이 오류를 해결하기 위해 하루가 소요되었다. (아까운 내 시간…)
💡해결
문제가 되었던 부분은 하나의 생각으로 해결되었다. 코드 상에서 아무런 문제가 발견되지 않았고, 이 외 요소들에서 문제가 발생되지 않았다면 분명 버전 문제가 있을 것이라 생각했다. 우선적으로 build.gradle을 확인해 보았고 여기서도 길고 긴 삽질 끝에 문제가 없음을 인지했다. 그러다 문득 한 가지 간과하고 있었음을 깨달았는데 이는 얼마 전 안드로이드13으로의 업데이트가 진행되었음을 잊고 있었다는 것이다. 아니나 다를까 해당 내용으로 개발자 문서를 찾아본 결과 아주 잘 나와있었다.
https://developer.android.com/develop/ui/views/notifications/notification-permission
위 문서의 내용에 대해 간단히 요약하자면,
Android 13(Api 33)에는 POST_NOTIFICATIONS라는 포그라운드 서비스 알림을 포함한 알림에 대한 런타임 권한이 도입되었습니다. 이 권한은 사용자가 수신하는 알림을 제어하는 데 도움이 되며 개발자가 권한을 요청할 수 있도록 합니다.
그렇다. 따라서 POST_NOTIFICATIONS 권한을 먼저 Manifest 파일에 명시해 주고, 해당 내용으로 권한 요청을 한 뒤 실행을 해본 결과… 해결되었다. 적용한 코드는 다음과 같다.
MainActivity.kt
class MainActivity : AppCompatActivity() {
    private lateinit var binding: ActivityMainBinding

    override fun onCreate(savedInstanceState: Bundle?) {
        super.onCreate(savedInstanceState)
        binding = ActivityMainBinding.inflate(layoutInflater)
        setContentView(binding.root)

        binding.mediaPlayButton.setOnClickListener {
            checkNotificationPermission()
        }
        binding.mediaPauseButton.setOnClickListener {
            mediaPlayerPause()
        }
        binding.mediaStopButton.setOnClickListener {
            mediaPlayerStop()
        }
    }

    ...

    private fun checkNotificationPermission() {
        when {
            checkSelfPermission(
                NOTIFICATION_PERMISSION
            ) == PackageManager.PERMISSION_GRANTED -> {
                mediaPlayerPlay()
            }
            shouldShowRequestPermissionRationale(NOTIFICATION_PERMISSION) -> {
                showNotificationPermissionDialog()
            }
            else -> {
                requestPermission()
            }
        }
    }

    private fun showNotificationPermissionDialog() {
        AlertDialog.Builder(this).apply {
            setMessage("앱에서 알림 기능을 위한 권한이 필요합니다.")
            setNegativeButton("취소", null)
            setPositiveButton("허용") { _, _ ->
                requestPermission()
            }
        }.show()
    }

    private fun requestPermission() {
        requestPermissions(arrayOf(NOTIFICATION_PERMISSION), NOTIFICATION_PERMISSION_CODE)
    }

    override fun onRequestPermissionsResult(
        requestCode: Int,
        permissions: Array<out String>,
        grantResults: IntArray
    ) {
        super.onRequestPermissionsResult(requestCode, permissions, grantResults)

        when (requestCode) {
            NOTIFICATION_PERMISSION_CODE -> {
                if ((grantResults.isNotEmpty() && grantResults.firstOrNull() == PackageManager.PERMISSION_GRANTED)) {
                    mediaPlayerPlay()
                } else {
                    return
                }
            }
            else -> {
                return
            }
        }
    }

    companion object {
        val NOTIFICATION_PERMISSION = android.Manifest.permission.POST_NOTIFICATIONS
        val NOTIFICATION_PERMISSION_CODE = 100
    }
}
오류도 해결했으니 이제 Notification으로 음원을 재생시켜 보자.
먼저 Notification을 생성하기 앞서 Notification Channel을 만들어줘야 한다. 채널을 만들기 위해 createNotificationChannel()이라는 이름의 메서드를 하나 만들어 주었다. 메서드 내부에서 먼저 “channel”이라는 이름의 변수에 NotificationChannel을 생성하였고 인자로 채널 ID, 채널 이름, 채널 중요도를 넣어주었다. 여기서 “CHANNEL_ID”는 상수로 Constant 파일에 선언해 주었다. 이후 baseContext에서 NotificationManager를 받아와 NotificationManager의 createNotificationChannel() 메서드의 인자로 “channel” 변수를 넣어 주었다. createNotificationChannel() 메서드는 서비스가 생성될 때 실행되므로 서비스의 onCreate()메서드 내부에 선언해 주었다.
Constant.kt
const val MEDIA_PLAYER_PLAY = "play"
const val MEDIA_PLAYER_PAUSE = "pause"
const val MEDIA_PLAYER_STOP = "stop"
const val CHANNEL_ID = "MEDIA_PLAYER_CHANNEL"
MediaPlayerService.kt
class MediaPlayerService : Service() {

    ...

    override fun onCreate() {
        super.onCreate()

        createNotificationChannel()
    }

    private fun createNotificationChannel() {
        val channel = NotificationChannel(CHANNEL_ID, "MEDIA_PLAYER", NotificationManager.IMPORTANCE_DEFAULT)
        val notificationManager = baseContext.getSystemService(NotificationManager::class.java)
        notificationManager.createNotificationChannel(channel)
    }

    ...

}
Notification Channel을 생성했으니 이제 Notification을 생성해 주면 된다. onCreate() 메서드에서 Notification.Builder() 메서드를 통해 Notification을 생성한다. 이후 생성될 Notification의 구성을 설정할 수 있다. 먼저 setStyle() 메서드를 사용하여 구성될 스타일을 정한다. setVisibility() 메서드를 통해서는 알림이 공개될 범위를 정한다. setSmallIcon() 메서드로는 표시될 알림의 아이콘을, addAction()은 알림의 기능으로 추가될 요소들을 설정한다. setContentIntent()는 사용자가 알림을 클릭했을 때 실행되었을 때의 기능을 추가하는 메서드로 해당 코드에서는 MainActivity로 이동하도록 구현했다. 또한 setContentTitle() 메서드는 말 그대로 알림의 제목을, setContentText()는 알림에 표시될 메시지를 정한다. 그리고 마지막에 build() 메서드를 추가하면 알림을 설정할 준비는 끝난다. 하지만 여기서 추가적으로 구성해야 할 요소들이 있는데, addAction() 메서드에서 사용될 알림의 기능적 요소들에 대한 아이콘과 PendingIntent를 설정해 줘야 한다. PendingIntent에 대해서는 나중에 더 자세히 설명하겠지만 간단히 먼저 설명하자면, 다른 앱이나 컴포넌트가 현재 앱을 대신하여 작업을 수행할 수 있도록 하는 하나의 인텐트 유형이다. 토큰과 같은 형식으로 액티비티 시작, 서비스 시작 등과 같은 작업을 수행하기 위해 Notification 또는 AlarmManager와 같은 컴포넌트와 함께 사용된다.
먼저 각각의 아이콘들은 Icon 클래스의 createWithResource() 메서드를 통해 가져온다. PendingIntent는 정지, 재생, 종료에 대한 기능을 위해 addAction() 메서드에 구현된다. 또한 알림 클릭 시 MainActivity로의 이동을 위해 mainPendingIntent까지 총 4개의 PendingIntent를 추가한다. 해당 요소들을 각각의 addAction과 setContentIntent의 인자로 넣어주면 된다.
MediaPlayerService.kt
override fun onCreate() {
    super.onCreate()

    createNotificationChannel()

    val playIcon = Icon.createWithResource(baseContext, R.drawable.ic_baseline_play_arrow_24)
    val pauseIcon = Icon.createWithResource(baseContext, R.drawable.ic_baseline_pause_24)
    val stopIcon = Icon.createWithResource(baseContext, R.drawable.ic_baseline_stop_24)

    val mainPendingIntent = PendingIntent.getActivity(
        baseContext,
        0,
        Intent(baseContext, MainActivity::class.java).apply {
            flags = Intent.FLAG_ACTIVITY_SINGLE_TOP
        },
        PendingIntent.FLAG_IMMUTABLE
    )

    val pausePendingIntent = PendingIntent.getService(
        baseContext,
        0,
        Intent(baseContext, MediaPlayerService::class.java).apply { action = MEDIA_PLAYER_PAUSE },
        PendingIntent.FLAG_IMMUTABLE
    )

    val playPendingIntent = PendingIntent.getService(
        baseContext,
        0,
        Intent(baseContext, MediaPlayerService::class.java).apply { action = MEDIA_PLAYER_PLAY },
        PendingIntent.FLAG_IMMUTABLE
    )
    val stopPendingIntent = PendingIntent.getService(
        baseContext,
        0,
        Intent(baseContext, MediaPlayerService::class.java).apply { action = MEDIA_PLAYER_STOP },
        PendingIntent.FLAG_IMMUTABLE
    )

    val notification = Notification.Builder(baseContext, CHANNEL_ID)
        .setStyle(
            Notification.MediaStyle()
                .setShowActionsInCompactView(0, 1, 2)
        )
        .setVisibility(Notification.VISIBILITY_PUBLIC)
        .setSmallIcon(R.drawable.ic_baseline_star_24)
        .addAction(
            Notification.Action.Builder(
                pauseIcon,
                "Pause",
                pausePendingIntent
            ).build()
        )
        .addAction(
            Notification.Action.Builder(
                playIcon,
                "Play",
                playPendingIntent
            ).build()
        )
        .addAction(
            Notification.Action.Builder(
                stopIcon,
                "Stop",
                stopPendingIntent
            ).build()
        )
        .setContentIntent(mainPendingIntent)
        .setContentTitle("음악 재생")
        .setContentText("음원이 재생 중 입니다.")
        .build()

    startForeground(100, notification)
}
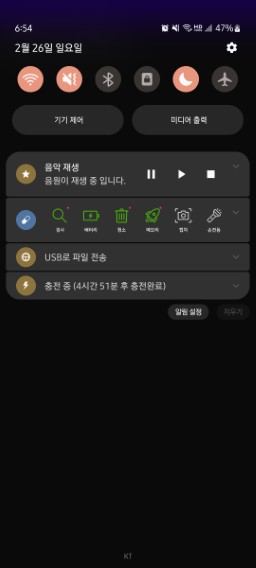
실행해 보면, 음원을 재생했을 때, Notification 표시 및 설정할 수 있으며 클릭 시, 앱의 메인으로 이동하는 것을 볼 수 있다.


📔전체 코드
https://github.com/Becomeproo/music_player
📔마무리
이번 앱을 진행하면서 무엇보다도 최신 정보에 민감하게 대응해야 한다는 점을 뼈저리게 느꼈다. gpt도 최신 정보를 알지 못하기 때문에 스스로 찾아볼 줄 알아야 하고 적용시켜보는 것이 중요하다는 것을 느꼈다. 이외에도 Service에 대해서 거의 처음 다루어 본 게 아닌가 싶을 정도로 모르는 점이 많았다. 차근차근 정리해 보면서 이에 대한 지식을 충분히 습득할 필요가 있음을 느꼈다.