[Android] Part1-계산기 앱
아래 내용은 패스트 캠퍼스 [35개 프로젝트로 배우는 Android 앱 개발 feat. Jetpack Compose]의 강의 내용을 기반으로 작성한 자습 기록입니다.
📚계산기 앱
ℹ️앱 설명
초기화 기능과 덧셈, 뺄셈 연산 기능을 수행하는 간단한 계산기 앱
✅구현 기능
- 숫자 입력 버튼, 초기화 버튼, 연산 버튼 등의 계산기 UI 화면
- 각각의 숫자 버튼 및 ‘+’, ‘-‘ 연산자 버튼 클릭 시 해당하는 값들이 연산식 텍스트 뷰에 입력되는 기능
- 초기화 버튼 클릭 시, 연산식 텍스트 뷰 및 연산 결과 텍스트 뷰를 초기화 시키는 기능
- ’=’ 버튼을 누르면, 연산식을 계산하여 연산 결과를 출력하는 기능
- 다크 모드 및 라이트 모드에 따른 UI를 그리는 기능
✅사용되는 기능
- UI
- ConstraintLayout - Flow
- style
- color (Light/Dark)
- theme
- Kotlin
- when
- StringBuilder
📔UI 구현 - 계산기 UI 구현
먼저 계산기 UI를 그리는 방법에는 여러 가지가 있다. 보통 TableLayout을 사용하여 각 행들을 나누어 버튼을 넣어 적용하는데, 이번에는 TableLayout이 아닌 ConstraintLayout의 Flow를 활용하여 UI를 구현해 보자.
먼저 1부터 9까지의 숫자를 표시하는 버튼은 모두 동일한 구조로 정의될 수 있다. 따라서 style을 적용하기로 하였다. styles 이름으로 된 새로운 리소스 파일을 values 폴더 아래에 생성해 주었다. 그리고 numberKeypad 스타일에 각각의 숫자 버튼 UI에 적용될 속성값들을 지정해 주었다.
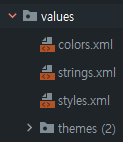
📖styles.xml
<?xml version="1.0" encoding="utf-8"?>
<resources>
    <style name="numberKeypad">
        <item name="android:textSize">40sp</item>
        <item name="android:layout_width">wrap_content</item>
        <item name="android:layout_height">wrap_content</item>
    </style>
</resources>
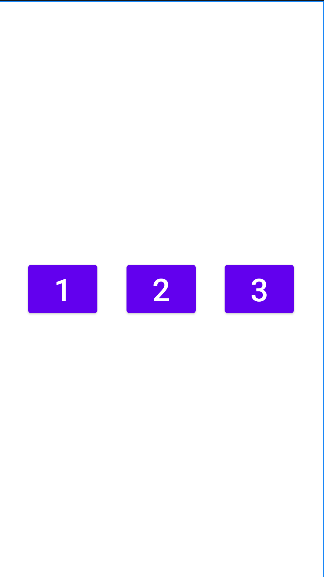
정의된 스타일을 android_main의 3개의 버튼에 지정해 주었다. 우선 정의된 버튼 3개가 모두 같은 스타일 값을 갖고, 같은 구조가 된 것을 볼 수 있다. 여기서 각각의 버튼을 ConstraintLayout - Flow를 활용하여 계산기 UI와 같이 정렬시켜보자.
우선 ConstraintLayout에 androidx.constraintlayout.helper.widget.Flow를 만들어 주었고, 상하좌우 모두 ConstraintLayout으로 향하도록 제약을 걸어주었다. 그 후 앞서 만들었던 세 개의 버튼 id 값을 Flow의 constraint_referenced_ids 속성값으로 적용시켰다. 여기서 constraint_referenced_ids 속성값은 순서가 중요한데 id값이 입력되는 순서대로 해당 값의 뷰가 정렬된다. 속성값의 결과로 세 개의 버튼이 수직과 수평 방향으로 중앙에 정렬된 것을 볼 수 있다. ConstraintLayout - Flow를 사용하지 않고 버튼끼리의 제약을 걸어 구현할 수도 있지만 Flow를 활용하여 id 값만 지정해 보다 손 쉽게 정렬된 UI를 구현할 수 있었다.
해당되는 코드에서 각각의 버튼에 제약이 설정되어 있지 않아 에러를 표시해주는데, Flow에 의해 배치가 되므로 모두 MissingConstraint를 설정해 주었다. 위의 내용들에 대한 코드와 결과 화면은 다음과 같다.
📖activity_main.xml
<?xml version="1.0" encoding="utf-8"?>
<androidx.constraintlayout.widget.ConstraintLayout xmlns:android="http://schemas.android.com/apk/res/android"
    xmlns:app="http://schemas.android.com/apk/res-auto"
    xmlns:tools="http://schemas.android.com/tools"
    android:layout_width="match_parent"
    android:layout_height="match_parent"
    tools:context=".MainActivity">

    <androidx.constraintlayout.helper.widget.Flow
        android:layout_width="0dp"
        android:layout_height="0dp"
        app:constraint_referenced_ids="button1, button2, button3"
        app:layout_constraintStart_toStartOf="parent"
        app:layout_constraintBottom_toBottomOf="parent"
        app:layout_constraintTop_toTopOf="parent"
        app:layout_constraintEnd_toEndOf="parent" />

    <Button
        android:id="@+id/button1"
        android:text="1"
        style="@style/numberKeypad"
        tools:ignore="MissingConstraints"
        />

    <Button
        android:id="@+id/button2"
        android:text="2"
        style="@style/numberKeypad"
        tools:ignore="MissingConstraints" />

    <Button
        android:id="@+id/button3"
        android:text="3"
        style="@style/numberKeypad"
        tools:ignore="MissingConstraints"
        />

</androidx.constraintlayout.widget.ConstraintLayout>
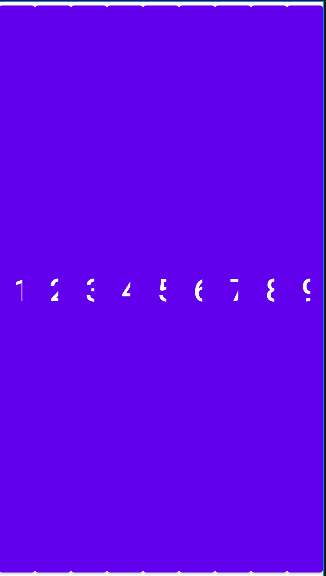
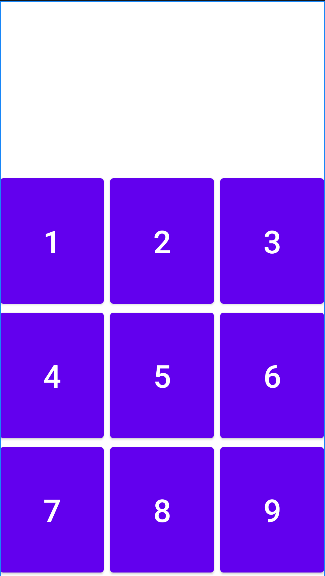
숫자 값을 가진 버튼은 9까지 있어야 하기 때문에 먼저 styles 파일에서 너비와 높이 값을 wrap_content가 아닌 0dp로 바꾸어 주었다. 버튼을 9까지 만들어 준 뒤, 해당 id 값들을 constraint_referenced_ids 속성값에 추가해 주었는데 아래 이미지와 같이 버튼들이 수평으로만 정렬된 것을 볼 수 있다.
버튼이 수직으로도 알맞게 정렬돼야 하기 때문에 몇 가지 속성을 추가하였다. 먼저 각 행이 3개의 버튼으로 구성되도록 하기 위해 flow_maxElementsWrap 속성을 추가하여 속성값으로 3을 넣어주었다. 또한 정렬을 적용하기 위해서는 한 가지 속성을 더 추가해 주어야 하는데 바로 flow_wrapMode 속성이다. 정렬을 적용하는 방식에 대해 지정할 수 있다. 이에 대한 속성값으로는 각 열 간의 균등한 정렬을 위해서 “chain” 값을 넣어주었다. 해당 값들을 적용하고 나면 각각의 버튼들이 균형 있게 정렬된 것을 볼 수 있다.
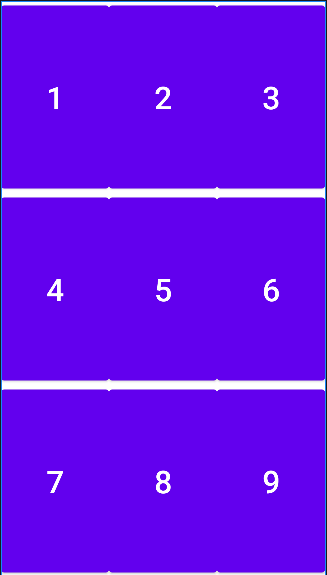
여기에 추가적으로, flow_horizontalGap 속성의 값으로 “8dp”를 넣어주어 열간의 간격을 조금씩 주었고, 화면 상단에는 연산식과 연산 결과를 보여줘야 하기 때문에 Flow의 속성값으로 layout_constraintHeight_percent 속성을 사용하여 값으로 “0.7”을 넣어주어 높이를 줄여주었으며, layout_constraintVertical_bias 속성값을 1로 하여 버튼들이 화면의 하단에 배치되도록 지정하였다. 해당하는 코드와 화면은 다음과 같다.
<?xml version="1.0" encoding="utf-8"?>
<androidx.constraintlayout.widget.ConstraintLayout xmlns:android="http://schemas.android.com/apk/res/android"
    xmlns:app="http://schemas.android.com/apk/res-auto"
    xmlns:tools="http://schemas.android.com/tools"
    android:layout_width="match_parent"
    android:layout_height="match_parent"
    tools:context=".MainActivity">

    <androidx.constraintlayout.helper.widget.Flow
        android:id="@+id/keypadFlow"
        android:layout_width="0dp"
        android:layout_height="0dp"
        app:constraint_referenced_ids="button1, button2, button3, button4, button5, button6, button7, button8, button9"
        app:flow_horizontalGap="8dp"
        app:flow_maxElementsWrap="3"
        app:flow_wrapMode="chain"
        app:layout_constraintBottom_toBottomOf="parent"
        app:layout_constraintEnd_toEndOf="parent"
        app:layout_constraintHeight_percent="0.7"
        app:layout_constraintStart_toStartOf="parent"
        app:layout_constraintTop_toTopOf="parent"
        app:layout_constraintVertical_bias="1" />

    <Button
        android:id="@+id/button1"
        style="@style/numberKeypad"
        android:text="1"
        tools:ignore="MissingConstraints" />

        ...

</androidx.constraintlayout.widget.ConstraintLayout>
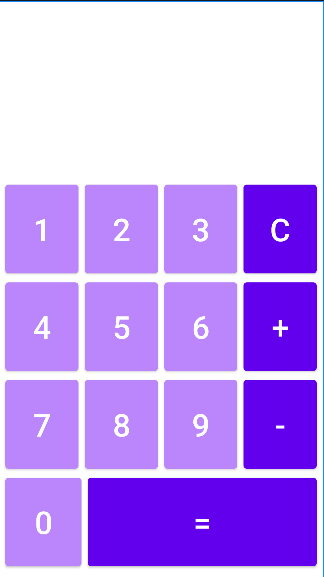
이제 여기에 5개의 버튼이 더 추가되어야 한다. 숫자 0, “+”, “-“ 연산자와 초기화 버튼, 그리고 결과를 표시하는 “=”의 버튼을 위의 숫자들의 구조와 동일하게 추가해 주었다.
이후 계산기 모양을 위해 flow_maxElementsWrap 속성값은 “4”로 바꾸어 주었고, constraint_referenced_ids 속성값에 5개의 버튼들을 적절하게 추가해 주었다. 이렇게 되면 총 14개의 버튼으로 밑에 두 개의 버튼이 남게 되는데 해당 버튼들을 좀 더 보기 좋게 만들기 위해 layout_constraintHorizontal_weight 속성값으로 “=” 버튼에는 “3”을, 숫자 0 버튼에는 “1” 값을 주어 1:3의 비율로 배치를 지정해 주었다.
또한 숫자 버튼과 그 이외의 버튼들의 구분을 위해 각각 두 가지의 색을 지정해 주었다. 이 과정에서 이외의 버튼들의 style 속성을 operatorKeypad의 이름으로 추가 생성했다.
📖activity_main.xml
<?xml version="1.0" encoding="utf-8"?>
<androidx.constraintlayout.widget.ConstraintLayout xmlns:android="http://schemas.android.com/apk/res/android"
    xmlns:app="http://schemas.android.com/apk/res-auto"
    xmlns:tools="http://schemas.android.com/tools"
    android:layout_width="match_parent"
    android:layout_height="match_parent"
    tools:context=".MainActivity">

    <androidx.constraintlayout.helper.widget.Flow
        android:id="@+id/keypadFlow"
        android:layout_width="0dp"
        android:layout_height="0dp"
        android:padding="8dp"
        app:constraint_referenced_ids="button1, button2, button3, buttonClear, button4, button5, button6, buttonPlus, button7, button8, button9, buttonMinus, button0, buttonEqual"
        app:flow_horizontalGap="8dp"
        app:flow_maxElementsWrap="4"
        app:flow_wrapMode="chain"
        app:layout_constraintBottom_toBottomOf="parent"
        app:layout_constraintEnd_toEndOf="parent"
        app:layout_constraintHeight_percent="0.7"
        app:layout_constraintStart_toStartOf="parent"
        app:layout_constraintTop_toTopOf="parent"
        app:layout_constraintVertical_bias="1" />

        ...

        ...

        ...

    <Button
        android:id="@+id/button0"
        style="@style/numberKeypad"
        android:text="0"
        app:layout_constraintHorizontal_weight="1"
        tools:ignore="MissingConstraints" />

    <Button
        android:id="@+id/buttonEqual"
        style="@style/operatorKeypad"
        android:text="="
        app:layout_constraintHorizontal_weight="3"
        tools:ignore="MissingConstraints" />

    <Button
        android:id="@+id/buttonClear"
        style="@style/operatorKeypad"
        android:text="C"
        tools:ignore="MissingConstraints" />

    <Button
        android:id="@+id/buttonPlus"
        style="@style/operatorKeypad"
        android:text="+"
        tools:ignore="MissingConstraints" />

    <Button
        android:id="@+id/buttonMinus"
        style="@style/operatorKeypad"
        android:text="-"
        tools:ignore="MissingConstraints" />

</androidx.constraintlayout.widget.ConstraintLayout>
📖styles.xml
<?xml version="1.0" encoding="utf-8"?>
<resources>
    <style name="numberKeypad">
        <item name="android:textSize">40sp</item>
        <item name="android:layout_width">0dp</item>
        <item name="android:layout_height">0dp</item>
        <item name="backgroundTint">@color/purple_200</item>
    </style>
    <style name="operatorKeypad" parent="numberKeypad">
        <item name="backgroundTint">@color/purple_500</item>
    </style>
</resources>
위 코드들의 결과 화면은 다음과 같다.
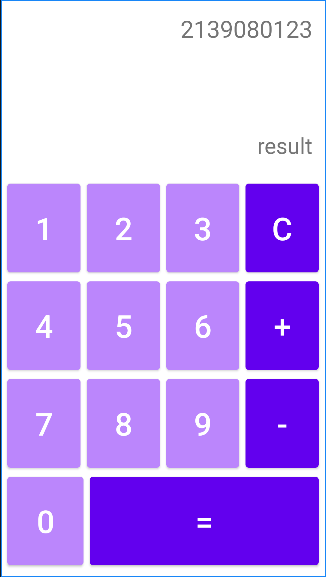
마지막으로 연산식을 표시하는 텍스트 뷰와 연산 결과를 표시하는 텍스트 뷰를 numberKeypad Flow 상단에 추가해 주었다. 구현된 결과는 다음과 같다.
<TextView
    android:id="@+id/equationTextView"
    android:layout_width="0dp"
    android:layout_height="0dp"
    android:gravity="end"
    android:padding="16dp"
    android:text="2139080123"
    android:textSize="30sp"
    app:layout_constraintBottom_toTopOf="@id/resultTextView"
    app:layout_constraintEnd_toEndOf="parent"
    app:layout_constraintStart_toStartOf="parent"
    app:layout_constraintTop_toTopOf="parent" />

<TextView
    android:id="@+id/resultTextView"
    android:layout_width="0dp"
    android:layout_height="wrap_content"
    android:gravity="end"
    android:padding="16dp"
    android:text="result"
    android:textSize="28sp"
    app:layout_constraintBottom_toTopOf="@id/keypadFlow"
    app:layout_constraintEnd_toEndOf="@id/equationTextView"
    app:layout_constraintStart_toStartOf="@id/equationTextView"
    app:layout_constraintTop_toBottomOf="@id/equationTextView" />

<androidx.constraintlayout.helper.widget.Flow
    ...
    />
📔기능 구현 - 계산 기능 구현
UI 구현이 모두 끝났으니 기능 구현을 해보도록 하자. UI의 각 뷰들을 가져오는 방법으로는 viewBinding을 사용하였다.
구현하기 앞서 계산기 기능의 내용은 다음과 같다.
- 두 개의 입력값을 받는다.
- 연산자는 한 번만 입력받도록 한다.
지금은 간단한 내용이지만 이후에 계속해서 기능을 추가할 예정이다.
먼저 두 개의 값과 한 개의 연산자를 입력받기 때문에 다음과 같이 클래스에 세 개의 변수를 추가해 주었다. 세 개의 값 모두 변화가 잦기 때문에 수정이 용이한 StringBuilder클래스로 선언해 주었다.
📖MainActivity.kt
class MainActivity : AppCompatActivity() {
    private lateinit var binding: ActivityMainBinding
    private val firstNumberText = StringBuilder("")
    private val secondNumberText = StringBuilder("")
    private val operatorText = StringBuilder("")

    ...
}
이번에는 각각의 버튼을 클릭했을 때 기능이 동작하도록 구현해 보자. 클릭 리스너 구현 시 이전에는 setOnClickListener를 사용했으나, 다수의 버튼이 동일하거나 비슷한 동작을 수행하기 때문에 xml 파일에서 onClick 속성을 추가해 클래스 파일에서 이를 받는 형식으로 구현해 보자. 먼저 button1에 android:onClick 속성을 추가한 뒤에 numberClicked라는 값을 주었다. 해당 속성을 생성한 뒤에는 클래스 파일에서 이것을 받는 함수를 구현해 주어야 한다. MainActivity에서 같은 이름의 view를 매개변수로 하는 numberClicked 함수를 생성해 주자. 로그를 띄워 버튼이 잘 동작하는지 확인해 보자.
📖activity_main.xml
    ...

<Button
    android:id="@+id/button1"
    style="@style/numberKeypad"
    android:text="1"
    android:onClick="numberClicked"
    tools:ignore="MissingConstraints" />

    ...
📖MainActivity.kt
class MainActivity : AppCompatActivity() {

    ...

    fun numberClicked(view: View) {
        Log.d("numberClicked", "1")
    }
}
잘 들어오는 듯하다.
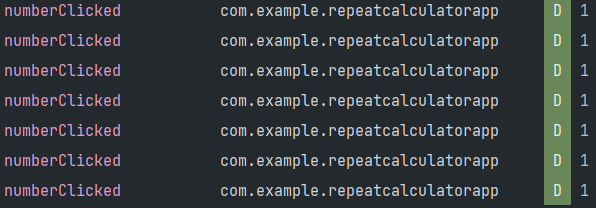
위와 같은 방식으로 나머지 숫자 버튼에도 numberClicked값의 onClick 속성을 부여해 주었고, “=” 버튼에는 equalClicked를, 초기화 버튼을 의미하는 “C”에는 clearClicked를, 마지막으로 두 개의 연산자 버튼에는 operatorClicked를 onClick 속성에 부여해 주었다.
다음으로 숫자 버튼을 눌렀을 때 동작하는 함수를 구현해 보자. numberClicked 함수 내부에 numberString이라는 이름의 변수를 지정해 주고, 이 값에 숫자 버튼에서 받아온 값을 넣어준다. 이때 인자로 받아오는 값은 View의 형태이므로, 이를 as 키워드를 사용하여 Button으로 형변환해 준 뒤, text 값을 받아오도록 한다.
📖MainActivity.kt
...

fun numberClicked(view: View) {
        val numberString = (view as? Button)?.text.toString() ?: ""

    }

...
이제 연산식을 표시하는 텍스트 뷰의 첫 번째 값을 입력할 수 있도록 구현해 보자.
위의 numberString 변수를 작성한 코드 아래에 첫 번째 값인지, 연산자 뒤의 두 번째 값인지 구분하기 위해 numberText 변수를 만들어 주고, 여기에 연산자가 쓰이지 않았다면 첫 번째 값을, 그게 아니라면 두 번째 값이라고 알려주도록 한다. 이때 연산자의 사용 여부는 isEmpty()를 사용하여 구분하도록 한다.
몇 번째 자리의 값인지 파악했으니 이 값에 위에서 가져온 숫자 버튼의 값을 StringBuilder 클래스의 append()를 사용하여 넣어주도록 한다. 해당 입력값을 보여주기 위해 equationTextView.text에 [$첫째 값 $연산자 $둘째 값] 형태의 표현식을 지정해 주고 여러 번 사용될 것이기 때문에 updateEquationTextView() 함수로 만들어 주었다.
    ...

    fun numberClicked(view: View) {
        val numberString = (view as? Button)?.text?.toString() ?: ""
        val numberText = if(operatorText.isEmpty()) firstNumberText else secondNumberText

        numberText.append(numberString)
        updateEquationTextView()
    }

    ...

    private fun updateEquationTextView() {
        binding.equationTextView.text = "$firstNumberText $operatorText $secondNumberText"
    }

    ...
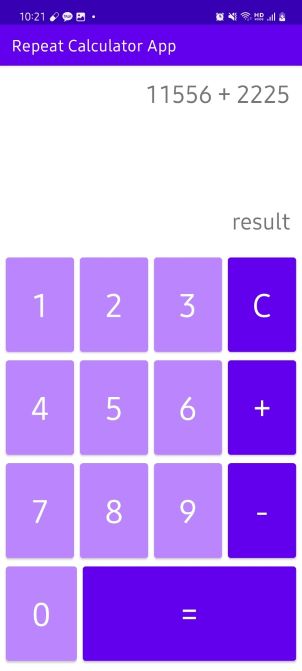
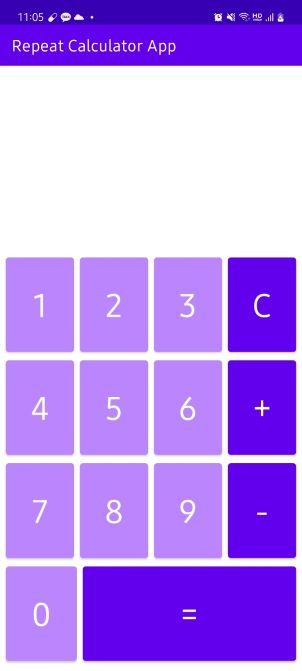
연산자 버튼 클릭 구현에 앞서 clearClicked 함수 먼저 구현해 보자. 구현은 간단하다. 첫째 값이 저장된 firstNumberText, 둘째 값이 저장된 secondNumberText, 연산자가 저장된 operatorText 값 각각을 clear() 해주면 된다. 이는 StringBuilder로 객체를 생성해 주었기 때문에 가능하다. 나중에 구현될 연산 결과 또한 초기화 버튼을 누르면 빈 값으로 바뀌도록 구현해 준다. 이후 updateEquationTextView()를 통해 UI를 업데이트 해준다.
    ...
    fun clearClicked(view: View) {
        firstNumberText.clear()
        secondNumberText.clear()
        operatorText.clear()
        updateEquationTextView()

        binding.resultTextView.text = ""
    }
    ...
다음으로 연산자 기능을 구현해보자. 연산자 값을 받아오는 것은 앞서 숫자를 받아오는 방법과 같으므로 operatorString 변수를 생성하여 버튼의 텍스트를 받아온다.
다음으로 연산자를 사용할 수 있는 조건을 정해준다. 조건은 2가지이다.
- 첫 번째 값 입력 전에 연산자를 입력할 수 없다.
- 연산자를 두 번 사용할 수 없다.
위 두 조건을 조건식으로 만들어주면 다음과 같다. 첫 번째 값이 비어있다면 아무 값도 입력되지 않았음을 의미하므로 이 과정에서 연산자 버튼을 누르면 돌려보낸다. 다음으로 두 번째 값이 입력되어 있다면 연산식 입력에 필요한 요소들이 모두 존재하므로 이 과저에서 연산자 버튼을 한 번 더 누르면 돌려보낸다.
firstNumberText.isEmpty()secondNumberText.isNotEmpty()
위 조건들을 만족하지 않을 경우, 사용자가 이를 인지하도록 Toast 메시지를 보여준 뒤, return 키워드를 사용하여 입력을 돌려보낸다. 조건들을 모두 충족했을 경우에는 operatorText에 받아온 operatorString을 지정해 주고 UI를 업데이트한다. 연산자를 받아올 수 있게 되었으므로 두 번째 값 또한 입력할 수 있다. 코드는 다음과 같다.
    ...

    fun operatorClicked(view: View) {
        val operatorString = (view as? Button)?.text?.toString() ?: ""

        if (firstNumberText.isEmpty()) {
            Toast.makeText(this, "먼저 숫자를 입력해주세요.", Toast.LENGTH_SHORT).show()
            return
        }

        if (secondNumberText.isNotEmpty()) {
            Toast.makeText(this, "1개의 연산자에 대해서만 연산이 가능합니다.", Toast.LENGTH_SHORT).show()
            return
        }

        operatorText.append(operatorString)
        updateEquationTextView()
    }
    ...
마지막으로 연산 결과 기능을 수행하는 equalClicked() 함수를 구현해 보자.
먼저 연산 결과가 구현되기 위해서는 연산식이 입력되어 있어야 한다. 따라서 첫째 값(firstNumberText), 둘째 값(secondNumberText), 연산자(operatorText)가 모두 구현되어 있어야 하므로 다음과 같은 조건식을 입력해 주었다. 세 요소 중 하나라도 입력되어 있지 않다면 돌려보낸다.
fun equalClicked(view: View) {
    if (firstNumberText.isEmpty() || secondNumberText.isEmpty() || operatorText.isEmpty()) {
        Toast.makeText(this, "올바르지 않은 수식입니다.", Toast.LENGTH_SHORT).show()
        return
    }
}
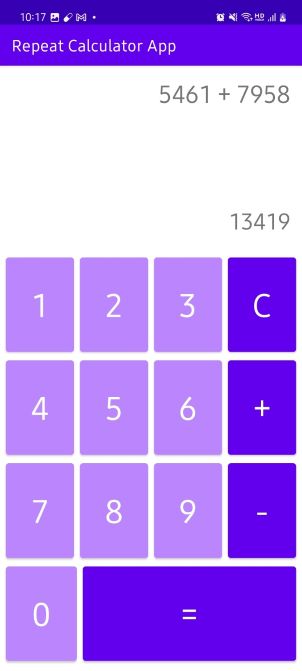
조건을 충족한다면 연산을 위해 firstNumberText와 secondNumberText의 값을 정수로 바꿔주어야 한다. 각각의 값을 toString().toInt()를 사용해 정수로 바꿔준다. 그리고 연산자에 따라 연산이 바뀌기 때문에 when 조건식을 사용해서 연산을 수행하도록 지정해 주었다. 이 값은 다시 텍스트 뷰에 보이도록 해야 하기 때문에 toString()을 통해 다시 문자열로 바꾸어 준다. 이후 텍스트 뷰에 연산 결과를 보여준다. 연산 결과 및 이전에 확인하지 못했던 초기화 기능까지 구현된 것을 확인할 수 있다.
    fun equalClicked(view: View) {
        if (firstNumberText.isEmpty() || secondNumberText.isEmpty() || operatorText.isEmpty()) {
            Toast.makeText(this, "올바르지 않은 수식입니다.", Toast.LENGTH_SHORT).show()
            return
        }
        val firstNumber = firstNumberText.toString().toInt()
        val secondNumber = secondNumberText.toString().toInt()

        val result = when (operatorText.toString()) {
            "+" -> firstNumber + secondNumber
            "-" -> firstNumber - secondNumber
            else -> "잘못된 수식입니다."
        }.toString()

        binding.resultTextView.text = result
    }
📔기능 구현 - 예외 상황 처리
⚠️오류
연산 기능을 확인하던 중 예외가 발생했다. 예외 내용은 다음과 같았다.
Caused by: java.lang.NumberFormatException: For input string: "5686888649"
NumberFormatException이다. 에러가 발생한 코드를 보니 입력값으로 받아온 텍스트를 정수형으로 변환하는 중에 예외가 발생한 것을 볼 수 있었다.
val firstNumber = firstNumberText.toString().toInt()
val secondNumber = secondNumberText.toString().toInt()
💡해결
위 부분에서 입력된 값이 Int 형의 범위를 초과해 발생한 예외였다. 이를 위해 더욱 큰 값을 수용하는 자료형으로 변환되도록 지정해 줬는데, 해당 자료형은 BigDecimal이다. BigDecimal은 최대 34자리의 값까지 수용할 수 있으므로 무리 없이 큰 값의 연산을 수행할 수 있다.
val firstNumber = firstNumberText.toString().toBigDecimal()
val secondNumber = secondNumberText.toString().toBigDecimal()
다음으로 입력 값의 첫 번째 숫자로 0이 입력된 뒤 이후에 입력되는 값이 있다면 해당 값으로 변환되도록 구현해 보자. 또한 세 자리마다 ‘,’를 추가해 가독성을 높여보도록 구현해 보자.
먼저 클래스 변수 입력 부분에 숫자가 입력될 형식을 지정하기 위해 decimalFormat이라는 이름의 변수에 DecimalFormat의 값을 지정해 주었다. DecimalFormat은 정숫값이 입력되는 형식을 지정하는 데 도움을 주는 클래스이다. 해당 클래스의 생성자에 "#,###"의 값을 넣어준다. 이는 만약 1000이라는 값을 입력했을 때, 해당 값을 1,000로 표현하도록 형식을 지정하겠다는 의미이다.
class MainActivity : AppCompatActivity() {
    private lateinit var binding: ActivityMainBinding
    private val firstNumberText = StringBuilder("")
    private val secondNumberText = StringBuilder("")
    private val operatorText = StringBuilder("")
    private val decimalFormat = DecimalFormat("#,###")

    ...

}
이후 UI를 업데이트하는 updateEquationTextView()에서 아래와 같은 값을 추가한다.
private fun updateEquationTextView() {
    val firstFormattedNumber = if(firstNumberText.isNotEmpty()) decimalFormat.format(firstNumberText.toString().toBigDecimal()) else ""
    val secondFormattedNumber = if(secondNumberText.isNotEmpty()) decimalFormat.format(secondNumberText.toString().toBigDecimal()) else ""

    binding.equationTextView.text = "$firstFormattedNumber $operatorText $secondFormattedNumber"
}
위 변수들이 의미하는 것은 값이 존재한다면 위에서 정의한 형식으로 지정된 값을 표시하고 그렇지 않다면 빈 값으로 표시하겠다는 의미이다. 해당 형식은 연산 결과를 표시하는 result 변수에 지정되는 when 조건문에도 적용되어야 한다. 따라서 다음과 같이 적용해 주었다.
fun equalClicked(view: View) {

    ...

    val result = when (operatorText.toString()) {
        "+" -> decimalFormat.format(firstNumber + secondNumber)
        "-" -> decimalFormat.format(firstNumber - secondNumber)
        else -> "잘못된 수식입니다."
    }.toString()

    binding.resultTextView.text = result
}
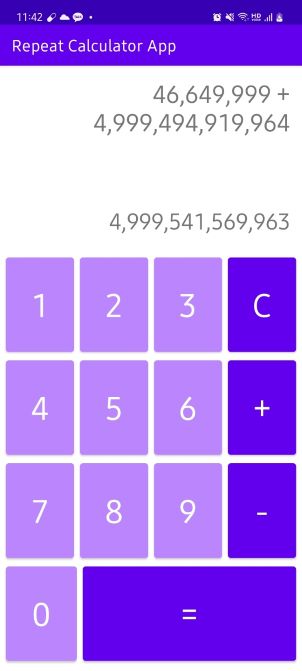
결과가 잘 구현된 것을 볼 수 있다.
📔UI 구현 - 액션 바 제거 및 다크 테마 적용
먼저 계산기 앱에서는 액션 바의 필요성이 크지 않기 때문에 액션바를 먼저 제거해 주도록 하자. 액션 바를 제거하는 방법은 [\res\values\themes.xml]에서 스타일이 적용되는 부분의 parent 값을 Theme.AppCompat.DayNight.NoActionBar로 바꾸어 주면 된다. NoActionBar는 액션 바를 적용하지 않는 의미의 속성이다. 오늘은 다크 테마도 적용할 것이기 때문에 themes.xml (night) 파일에서도 위와 동일하게 NoActionBar를 적용시켜 준다.
📖themes.xml, themes.xml (night)
<resources xmlns:tools="http://schemas.android.com/tools">
    <!-- Base application theme. -->
    <style name="Theme.RepeatCalculatorApp" parent="Theme.AppCompat.DayNight.NoActionBar">
        ...
    </style>
</resources>
다음으로 다크 테마를 적용해 보자. 텍스트의 색상만 다크 테마에 맞게 조정하는 간단한 구현을 할 것이다. 먼저 다크 테마에도 적용할 색상 파일을 새로 만들어 주자. 새로운 리소스 파일을 만들어 주는데, 파일 이름을 colors로 명명하고 디렉터리 명을 values-night로 명명해 주자. 다크 모드를 위한 파일이라는 의미로 생각하면 된다.
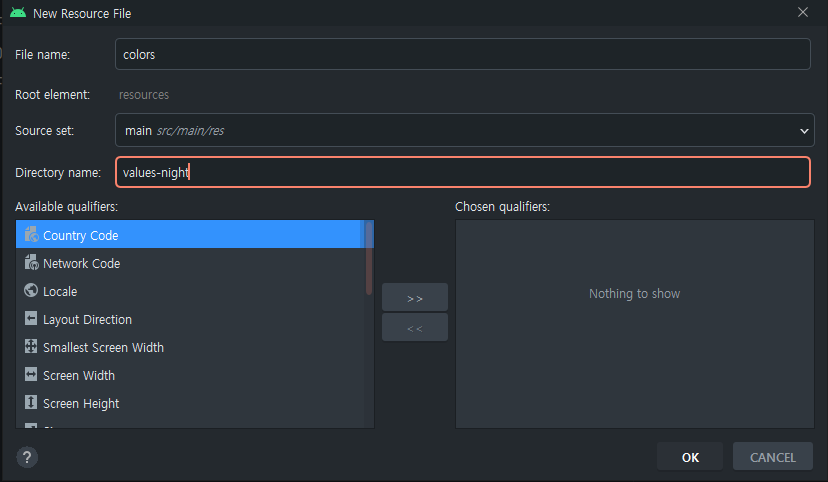
파일을 생성해 주면 아래와 같이 두 개의 colors 파일이 존재하는 것을 볼 수 있는데 하나는 night로 지정되어 있다.

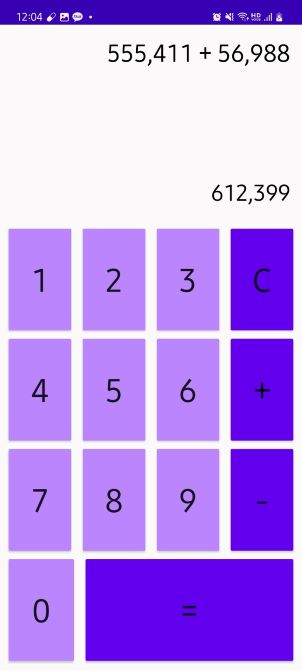
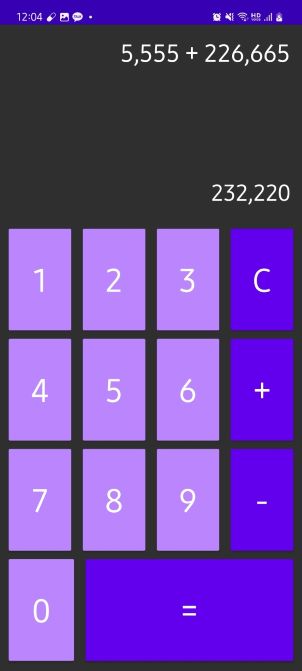
이제 다크 모드를 위한 색상 파일도 만들었으니 텍스트의 색상을 다르게 지정해 보자. 두 개의 colors 파일에 이름이 같은 “defaultTextColor”라는 이름으로 추가해 준 뒤, 라이트 모드에서는 검정 텍스트를 위해 #FF000000 값을, 다크 모드에서는 흰 텍스트를 위해 #FFFFFFFF 값을 지정해 준다. 이후 activity_main 파일에서 연산식과 연산 결과 텍스트 뷰의 android:textColor 속성에 @color/defaultTextColor 값을 지정해 주면 두 가지 모드에서 다른 색상으로 텍스트가 표시되는 것을 볼 수 있다.
📖colors.xml
<?xml version="1.0" encoding="utf-8"?>
<resources>
    ...
    <color name="defaultTextColor">#FF000000</color>
</resources>
📖colors.xml (night)
<?xml version="1.0" encoding="utf-8"?>
<resources>
    <color name="defaultTextColor">#FFFFFFFF</color>
</resources>
📖activity_main.xml
        ...

<TextView
        android:id="@+id/equationTextView"
        android:layout_width="0dp"
        android:layout_height="0dp"
        android:gravity="end"
        android:padding="16dp"
        android:text="2139080123"
        android:textColor="@color/defaultTextColor"
        android:textSize="30sp"
        app:layout_constraintBottom_toTopOf="@id/resultTextView"
        app:layout_constraintEnd_toEndOf="parent"
        app:layout_constraintStart_toStartOf="parent"
        app:layout_constraintTop_toTopOf="parent" />

    <TextView
        android:id="@+id/resultTextView"
        android:layout_width="0dp"
        android:layout_height="wrap_content"
        android:gravity="end"
        android:padding="16dp"
        android:text="result"
        android:textColor="@color/defaultTextColor"
        android:textSize="28sp"
        app:layout_constraintBottom_toTopOf="@id/keypadFlow"
        app:layout_constraintEnd_toEndOf="@id/equationTextView"
        app:layout_constraintStart_toStartOf="@id/equationTextView"
        app:layout_constraintTop_toBottomOf="@id/equationTextView" />

        ...
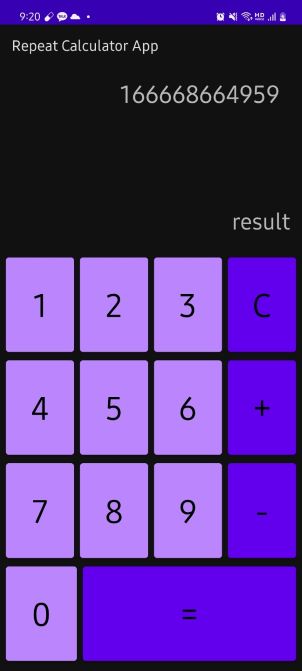
수정된 UI의 결과로 액션바가 사라지고, 두 가지 모드에서의 텍스트 색상이 다른 것을 확인할 수 있다.
📔전체 코드
https://github.com/Becomeproo/calculator
📔마무리
앱을 만드는 데 있어서 적절한 예외 처리는 더욱 좋은 앱을 만든다는 것을 알게 되었고, 다크 테마를 적용하는 연습도 해야 한다는 생각이 들었다. 또한 오류를 해결하는 과정에서 기본기를 확실히 해두는 것이 무엇보다도 중요하다는 것을 느꼈다.
계산기 앱의 기능이 많기 때문에 이후 틈틈이 기능을 업데이트할 예정이다.