[Android] ConstraintLayout 정리(4) - Centering Positioning
아래 내용은 Android Developer 공식 문서와 recipes4dev님의 블로그, EMU(Eastern Mediterranean University) 제공 문서] 내용을 참고하여 작성한 자습 기록입니다.
📚ConstraintLayout 정리(4) - Centering Positioning
📔Centering Positioning
Centering Positioning은 뷰 위젯을 레이아웃에 가운데에 배치하는 것을 말한다. 하지만 ConstraintLayout에 가운데에 바로 배치할 수 있도록 해주는 속성이 달리 없다. 그렇다면 어떻게 해야 할까?
이를 위해서는 뷰 위젯의 양 방향으로 제약을 지정해 주면 된다. 이렇게 되면 뷰 위젯을 가운데 놓고 양쪽에서 잡아당기는 것처럼 보이게 된다. 코드로 보면 다음과 같다.
<?xml version="1.0" encoding="utf-8"?>
<androidx.constraintlayout.widget.ConstraintLayout xmlns:android="http://schemas.android.com/apk/res/android"
    xmlns:app="http://schemas.android.com/apk/res-auto"
    xmlns:tools="http://schemas.android.com/tools"
    android:layout_width="match_parent"
    android:layout_height="match_parent"
    tools:context=".MainActivity">

    <Button
        android:id="@+id/button1"
        android:layout_width="130dp"
        android:layout_height="70dp"
        android:text="Button1"
        app:layout_constraintEnd_toEndOf="parent"
        app:layout_constraintStart_toStartOf="parent" />

</androidx.constraintlayout.widget.ConstraintLayout>

상단과 하단 쪽으로 제약을 지정하면 버튼이 가운데 높이에 배치된다.
<?xml version="1.0" encoding="utf-8"?>
<androidx.constraintlayout.widget.ConstraintLayout xmlns:android="http://schemas.android.com/apk/res/android"
    xmlns:app="http://schemas.android.com/apk/res-auto"
    xmlns:tools="http://schemas.android.com/tools"
    android:layout_width="match_parent"
    android:layout_height="match_parent"
    tools:context=".MainActivity">

    <Button
        android:id="@+id/button1"
        android:layout_width="130dp"
        android:layout_height="70dp"
        android:text="Button1"
        app:layout_constraintTop_toTopOf="parent"
        app:layout_constraintBottom_toBottomOf="parent" />

</androidx.constraintlayout.widget.ConstraintLayout>
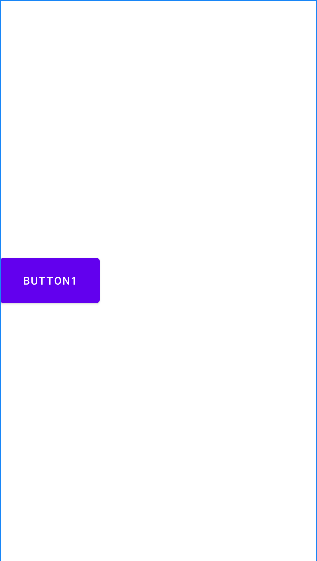
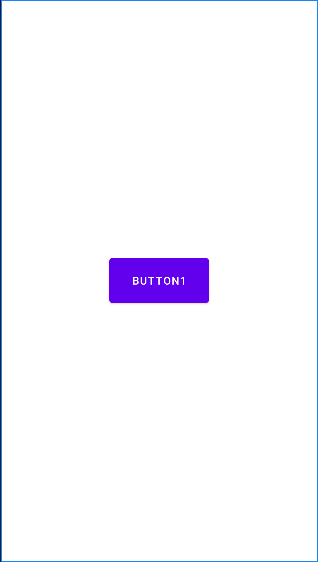
버튼을 레이아웃의 정중앙에 배치하고 싶다면 위의 두 코드를 합치면 된다. 즉, 버튼의 제약 조건을 상, 하, 좌, 우로 지정하면 된다는 뜻이다. 이렇게 하면 아래와 같이 버튼이 원하는 대로 레이아웃의 정중앙에 배치된 것을 볼 수 있다.
<?xml version="1.0" encoding="utf-8"?>
<androidx.constraintlayout.widget.ConstraintLayout xmlns:android="http://schemas.android.com/apk/res/android"
    xmlns:app="http://schemas.android.com/apk/res-auto"
    xmlns:tools="http://schemas.android.com/tools"
    android:layout_width="match_parent"
    android:layout_height="match_parent"
    tools:context=".MainActivity">

    <Button
        android:id="@+id/button1"
        android:layout_width="130dp"
        android:layout_height="70dp"
        android:text="Button1"
        app:layout_constraintBottom_toBottomOf="parent"
        app:layout_constraintEnd_toEndOf="parent"
        app:layout_constraintStart_toStartOf="parent"
        app:layout_constraintTop_toTopOf="parent" />

</androidx.constraintlayout.widget.ConstraintLayout>
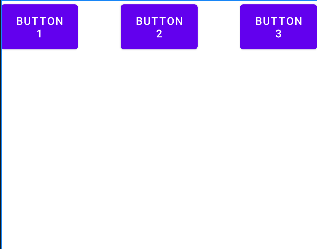
이러한 효과는 뷰들간의 제약에서도 동일하게 발생한다. 위 코드에서 버튼 2개를 추가하여 총 3개의 버튼이 존재하는데, button2를 양쪽에 배치되어 있는 버튼들의 가운데에 위치시키고 싶다면, button2의 시작 사이드를 button1의 끝 사이드에, button2의 끝 사이드를 button3의 시작 사이드에 제약을 지정하면 된다. 코드로 보면 다음과 같다.
<?xml version="1.0" encoding="utf-8"?>
<androidx.constraintlayout.widget.ConstraintLayout xmlns:android="http://schemas.android.com/apk/res/android"
    xmlns:app="http://schemas.android.com/apk/res-auto"
    xmlns:tools="http://schemas.android.com/tools"
    android:layout_width="match_parent"
    android:layout_height="match_parent"
    tools:context=".MainActivity">

    <Button
        android:id="@+id/button1"
        android:layout_width="100dp"
        android:layout_height="70dp"
        android:text="Button1"
        app:layout_constraintStart_toStartOf="parent" />

    <Button
        android:id="@+id/button2"
        android:layout_width="100dp"
        android:layout_height="70dp"
        android:text="Button2"
        app:layout_constraintEnd_toStartOf="@id/button3"
        app:layout_constraintStart_toEndOf="@id/button1" />

    <Button
        android:id="@+id/button3"
        android:layout_width="100dp"
        android:layout_height="70dp"
        android:text="Button3"
        app:layout_constraintEnd_toEndOf="parent" />
</androidx.constraintlayout.widget.ConstraintLayout>
📔Bias
Centering Positioning을 통해 가운데 배치된 뷰 위젯을 양쪽 방향 중 특정 방향으로 치우치게 만들기 위해서는 bias 속성을 사용하면 된다.
수평 또는 수직의 방향의 제약을 통해 뷰 위젯이 가운데에 배치되는 것을 보면 알 수 있듯이, bias 속성은 수평, 수직 두 가지 종류가 있다.
- layout_constraintHorizontal_bias
- layout_constraintVertical_bias
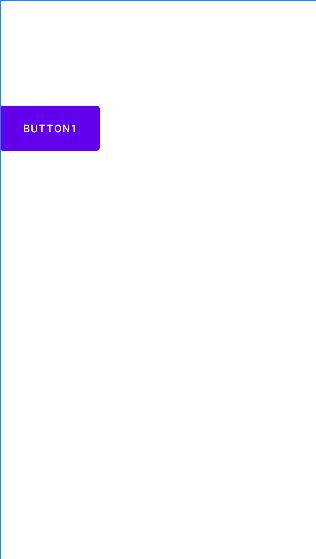
위 두 속성은 0 ~ 1 사이의 소수 값을 가지며, 기본 값은 0.5이다.
📖layout_constraintVertical_bias
<?xml version="1.0" encoding="utf-8"?>
<androidx.constraintlayout.widget.ConstraintLayout xmlns:android="http://schemas.android.com/apk/res/android"
    xmlns:app="http://schemas.android.com/apk/res-auto"
    xmlns:tools="http://schemas.android.com/tools"
    android:layout_width="match_parent"
    android:layout_height="match_parent"
    tools:context=".MainActivity">

    <Button
        android:id="@+id/button1"
        android:layout_width="130dp"
        android:layout_height="70dp"
        android:text="Button1"
        app:layout_constraintVertical_bias="0.2"
        app:layout_constraintTop_toTopOf="parent"
        app:layout_constraintBottom_toBottomOf="parent" />
</androidx.constraintlayout.widget.ConstraintLayout>
📖layout_constraintHorizontal_bias
<?xml version="1.0" encoding="utf-8"?>
<androidx.constraintlayout.widget.ConstraintLayout xmlns:android="http://schemas.android.com/apk/res/android"
    xmlns:app="http://schemas.android.com/apk/res-auto"
    xmlns:tools="http://schemas.android.com/tools"
    android:layout_width="match_parent"
    android:layout_height="match_parent"
    tools:context=".MainActivity">

    <Button
        android:id="@+id/button1"
        android:layout_width="130dp"
        android:layout_height="70dp"
        android:text="Button1"
        app:layout_constraintHorizontal_bias="0.2"
        app:layout_constraintEnd_toEndOf="parent"
        app:layout_constraintStart_toStartOf="parent" />
</androidx.constraintlayout.widget.ConstraintLayout>
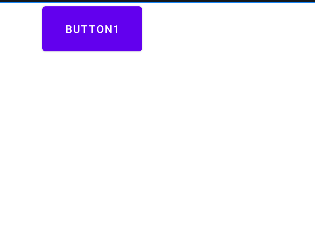
위 두 속성 또한 마찬가지로 뷰 위젯들 간의 제약에서 지정할 수 있다.